We’ll use some opacity masks, brushes, gradients and effects, in addition to an easy shading technique you’ll find yourself using in plenty of other projects. Get ready to tuck into this Aussie-flavored tut!
Step 1
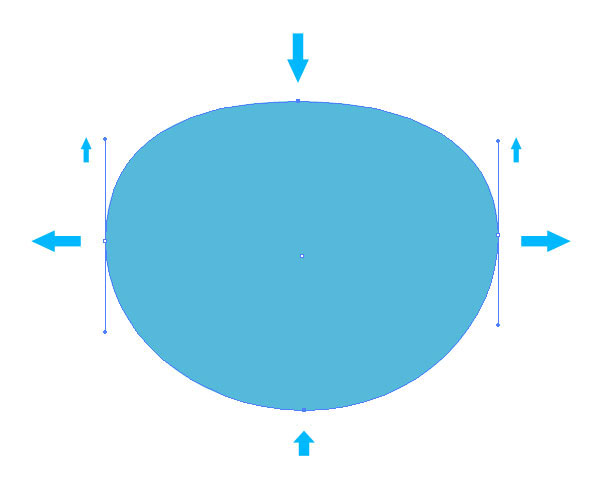
Open a new 900px by 700px document, set it to RGB, at 72 dpi. Let’s start by creating the basic head shape! We are using blue as our base color here, but obviously color choice is entirely up to you. Be sure to save (Command + S) with each step. By double-clicking Fill on the color Palette (F6), change the fill color to a nice blue; we used #33BBDB.With the Ellipse Tool (L) selected hold Alt + Shift and drag out a circle in the middle of your document. Using the Direct Selection Tool (A), move the top point down and raise the two side point’s upper handles to create the shape below.
Step 2
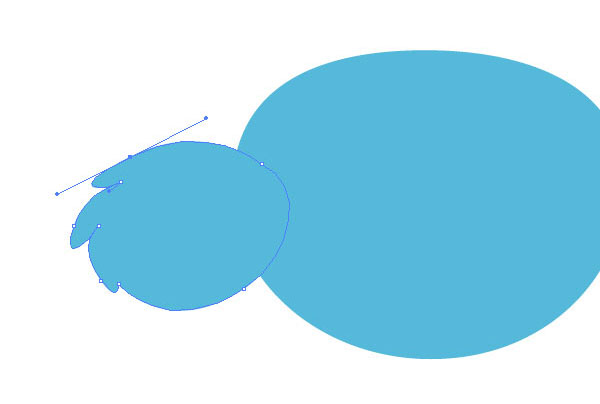
To get into a good habit from the outset, let’s name our layers! We will suggest layer names at the beginning, but we encourage you just to use whatever makes sense to you. In your Layers Palette double-click “Layer 1″ and name this layer "koala."Click on the small white arrow next to the thumbnail to show the paths of this layer. Double-click the path you just created and name this layer "head." Using the Pen Tool (P) we are going to create a shaggy ear. Here is a great resource to gain familiarity with the Pen Tool, if required. Name this layer "ear L."
Step 3
To create an inner ear simply select "ear L", Copy it (Command + C) and Paste it in place (Command + F). Change the Fill to White. Bring up the Transparency Palette (Shift + Command + F10) and change the Opacity to 50%. Name the layer "inner ear."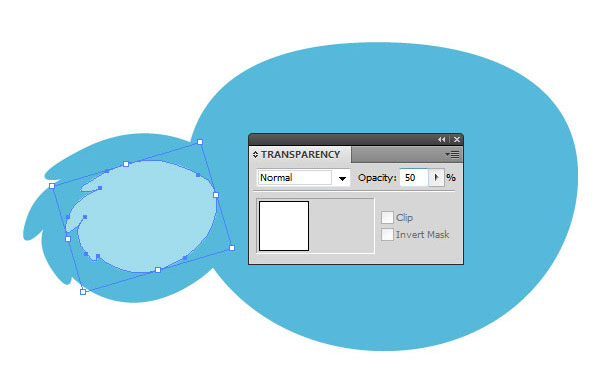
Step 4
Select both ear layers and Group them (Command + G). Name this group "ear L." Choose the Selection Tool (V) and select this group. Ensure that the Reflect Tool is selected (O) and double-click its icon on the toolbar (below the Eraser). This will bring up the Reflect Dialogue box. Select Vertical as the axis and choose Copy. This will create a vertically flipped copy of the ear.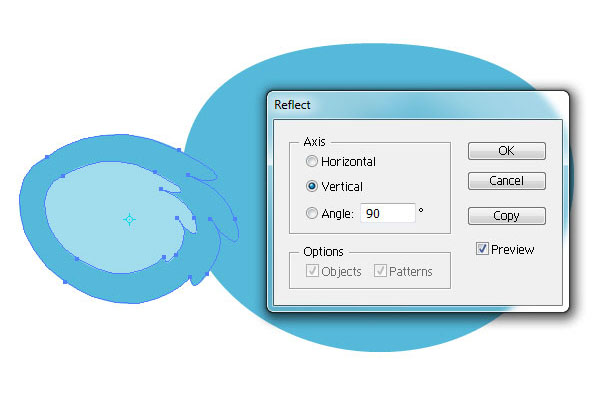
Step 5
Using the Selection Tool (V), move the flipped ear over to the other side of the head and change its name to "ear R." In your Layers Palette move the "head" layer above both ear layers. Notice that the left ear is positioned closer to (or further behind) the head than the right – this will give our koala’s head some dimension by giving the illusion of roundness.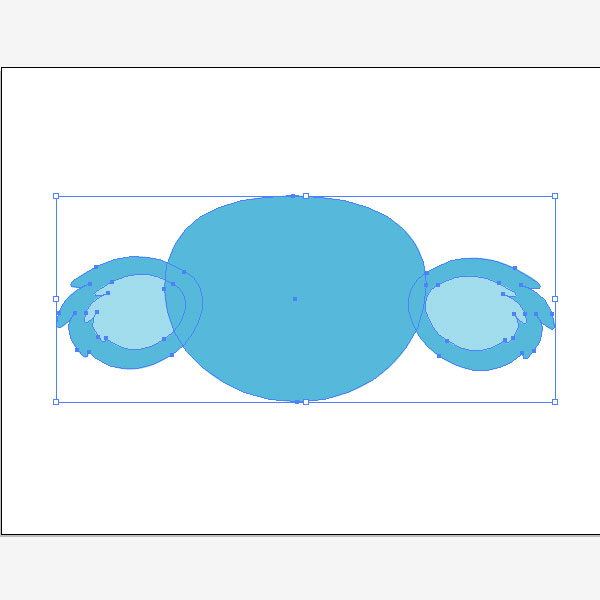
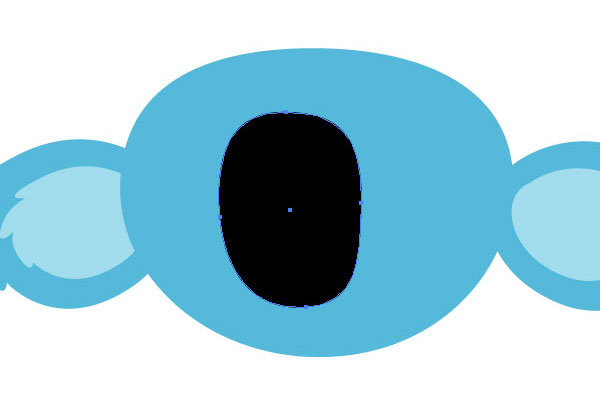
Step 6
Next let’s make the nose! As with the head, start with the Ellipse Tool (L) and create a perfect circle (hold Alt + Shift) in the middle of the head. Change its Fill to Black and name it "nose."Use the points and handles as before to create a squarish koala-esque nose. The key here is to raise and lower the top and bottom points of the circle, move the two side points in towards the middle and stretch out the handles of each point until you have something that looks like the image below.
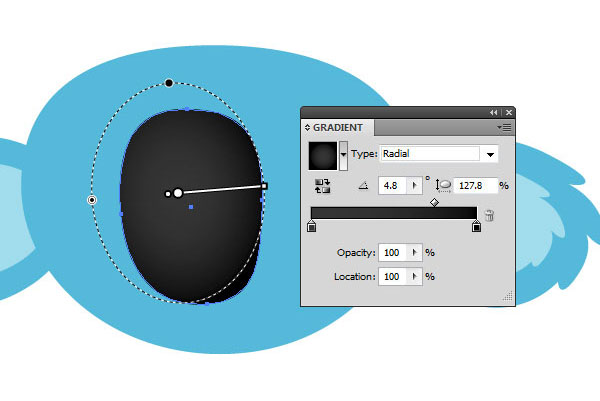
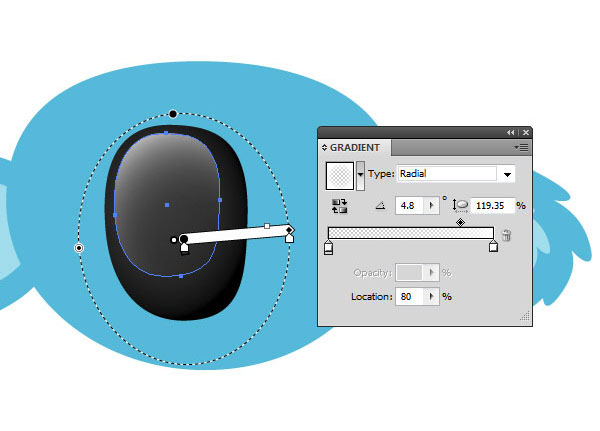
Step 7
Give the nose some depth by giving it a black to gray gradient. To do this select the nose shape, bring up the Gradient Palette, select Radial as the gradient Type and double-click the first color slider to change its color to gray (R=50, G=50, B=50) and the other black (R=0, G=0, B=0).Now move the small diamond slider in the middle to a Location Value of 75% (towards black). This will increase the area of the gray on the nose. To conform the shape of the gradient to the nose, select the Gradient Tool (G) and make adjustments as shown below.
Step 8
To give the nose a bit more life (it looks quite flat and dull) we will add a very simple reflection. Copy (Command + C) the nose and Paste in place (Command + F). Using the Selection Tool (V), resize and reposition the shape up towards the top left of the nose.Head back over to the Gradient Palette and change the first slider from gray to white and change its opacity to 0%. Change the other from black to white. Change the location of the diamond slider to 80%. Using the Gradient Tool (G) position the gradient as demonstrated below.
Step 9
Now for the eyes. Create a perfect circle using the Ellipse Tool (L) next to the nose and give it a radial gradient of white (R=255, G=255, B=255) to beige (R=237, G=231, B=221). Duplicate (Command +C an Command +F) this circle, move it over to the other side of the nose and make it slightly smaller. Move these two layers below the nose in the Layers Palette and name them appropriately.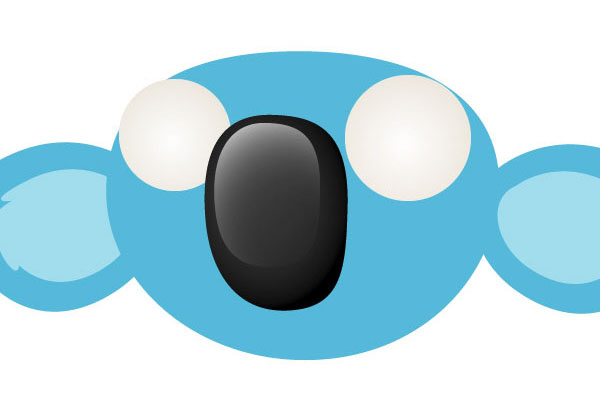
Step 10
These eyes need irises, and we’ll be using our previous tutorial Create a Set of Shiny Character Eyes to make these. Again, you can choose any color – here we have used orange. Place your irises as shown below.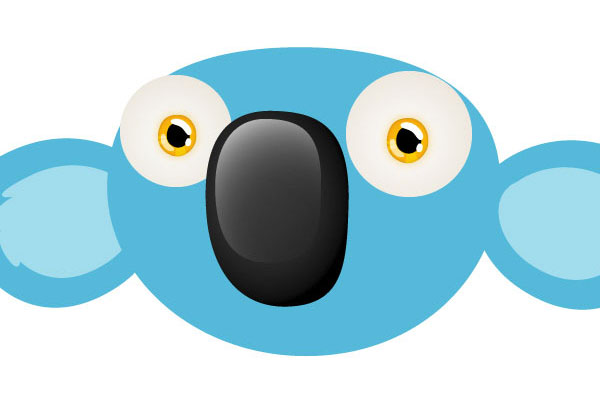
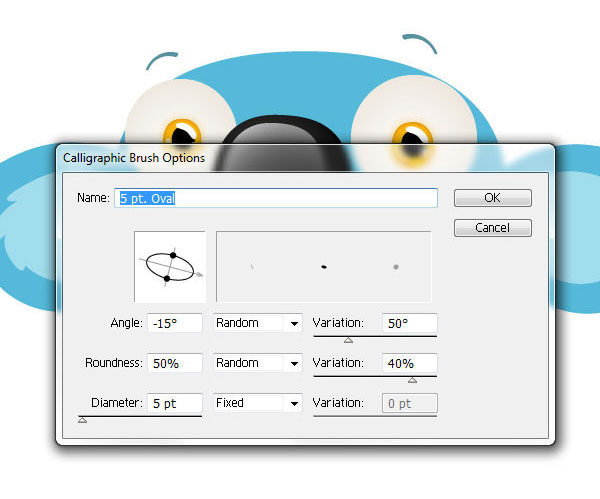
Step 11
Some quick eyebrows can be made easily by using one of the default calligraphic brushes from the Brushes Palette (F5) with the settings shown below. Use the Brush Tool (B) to draw one eyebrow, Undo (Command +Z) and redraw until you are happy with the result.Use the Selection Tool (V) to select the eyebrow, go to Object > Expand Appearance. Change the color to #007787, then use the same method as with the ear to vertically flip the eyebrow and move it over to the other eye.
Step 12
The mouth is probably the most complex part of this tutorial, and it’s really quite straightforward. Start by creating an ellipse under the koala’s nose, much like a sausage shape, using the Ellipse Tool (L). Edit its points until you have something like the image below. Use the Eyedropper Tool (I) to grab the gradient from one of the eyes – this’ll do nicely for our mouth.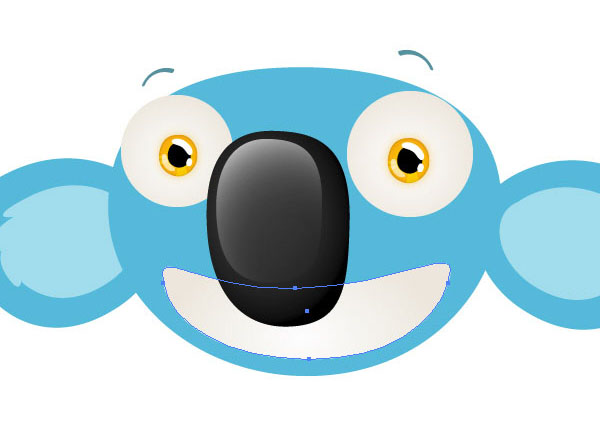
Step 13
Next, using the Line Segment Tool (\), create a single line near the left of the mouth with a Black, 1pt Stroke. Use the Stroke Palette (Command + F10) to change these settings.Now select the line and while holding Alt + Shift, drag a duplicate of that line one tooth-distance over. It’s up to you how large your characters teeth are! Now press Command +D (Transform Again) to have Illustrator automatically repeat your last action, until there are an appropriate number of teeth lines across the mouth. Group these lines (Command + G).
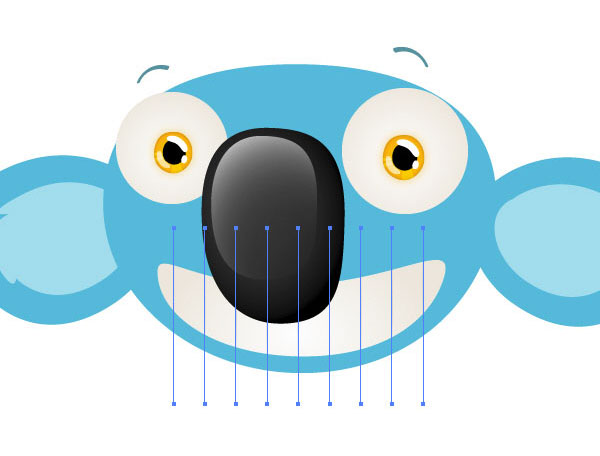
Step 14
Using the Pen Tool (P) add a curved line from one edge of the mouth to the other, with the same stroke settings as the other lines. Group this with the other lines and call this group “teeth.” You should have something like the image below.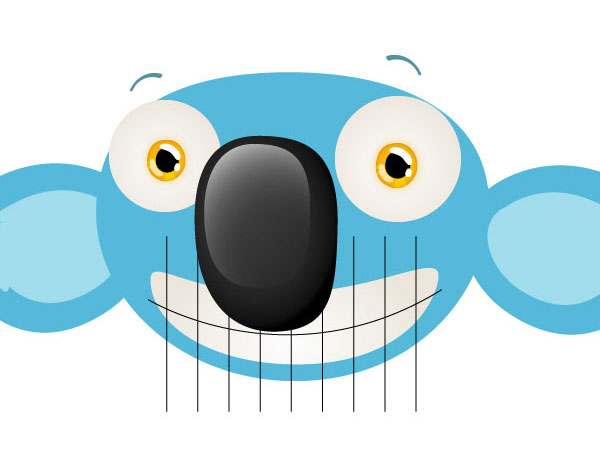
Step 15
Let’s create an opacity mask, to conform the teeth to the shape of the mouth. Select the mouth and Copy it (Command + C). Then select the teeth group, open your Transparency Palette (Shift + Command + F10) and double-click the empty space next the group’s thumbnail image. Your teeth lines will disappear and a black square will appear where you clicked. Paste in place (Command + F) to bring the mouth shape up, and change its Fill color to white. This reveals your teeth group once again. You can exit the opacity mask by clicking on the thumbnail next to the mask.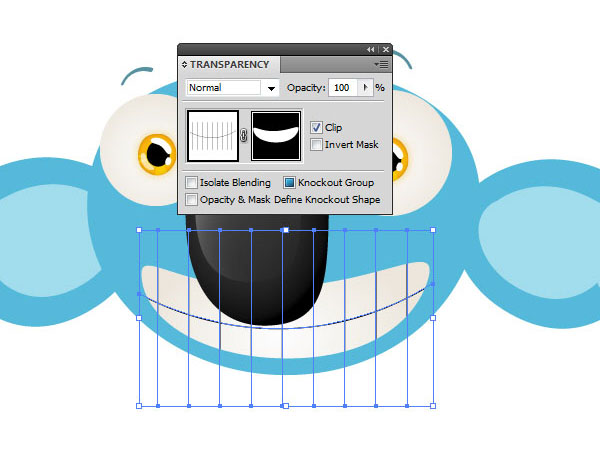
Step 16
To soften the lines of the teeth, drop the Opacity of the teeth group to 40%. Then, entering the mask again, select the mouth shape and apply Effect > Stylize > Inner Glow. Ensure the settings are as below, and the mouth is done!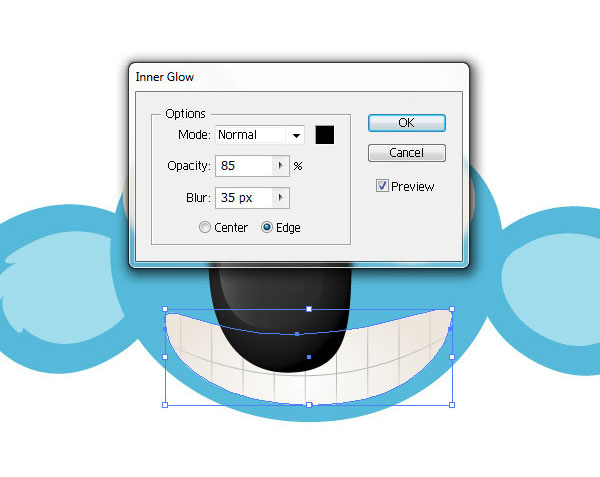
Step 17
We are nearly finished, just a few final touches! With the Pen Tool (P) give your koala some hair, to make him/her a little cuter.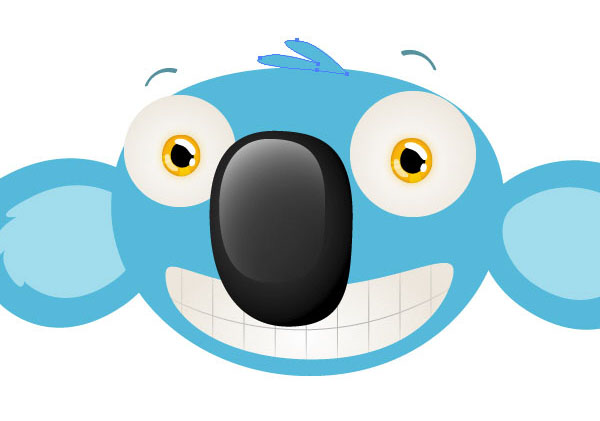
Step 18
Using the Pen Tool (P) again, draw a curved line as shown below, with a stroke color of white and 1pt thickness. Set the Opacity to 50% and duplicate it four times to look like the image below.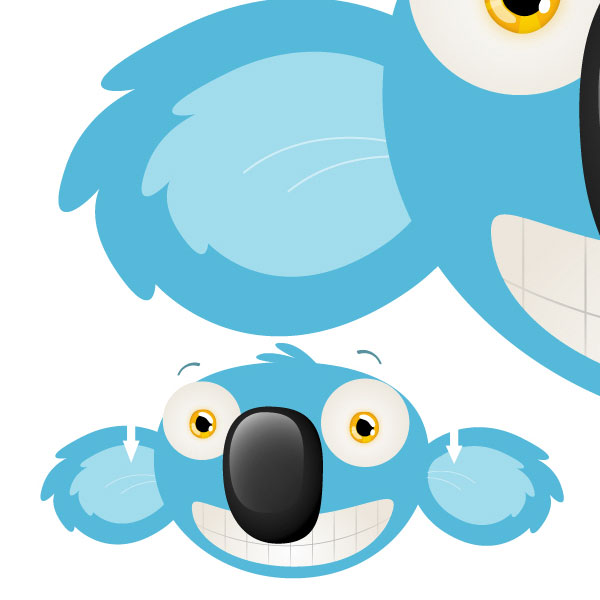
Step 19
For some freckles create a series of small ellipses on the cheeks of the koala using the Ellipse Tool (L) and Selection Tool (V). Group them and change the Fill color to black, Blend Mode to Multiply and Opacity to 20%.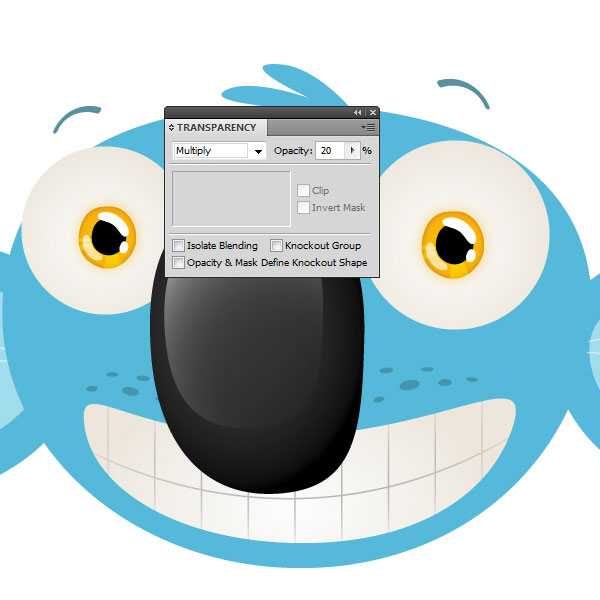
Step 20
Soften these freckles by selecting the group and creating an opacity mask (as before, double-click the area on the Transparency Palette next to the thumbnail). This time create a circle with the Ellipse Tool (L) and give it a radial black to white gradient.Duplicate this and position the two circles over the freckles as shown below. Notice the blurred white dots on the opacity mask – this is how your gradient circles should appear. Leave the opacity mask.
Step 21
Our koala is rapidly nearing completion; we’ll just add some subtle shading. The method we’ll use here is a nice technique that you can use easily for other projects. Simply create yet another ellipse anywhere on the stage – approximately as big as one of the eyes. Jump to your Gradient Palette and give it a black to black radial gradient, and set the second slider’s opacity to 0%. Set the circle’s Blending Mode to Multiply and the Opacity to 20 – 30%.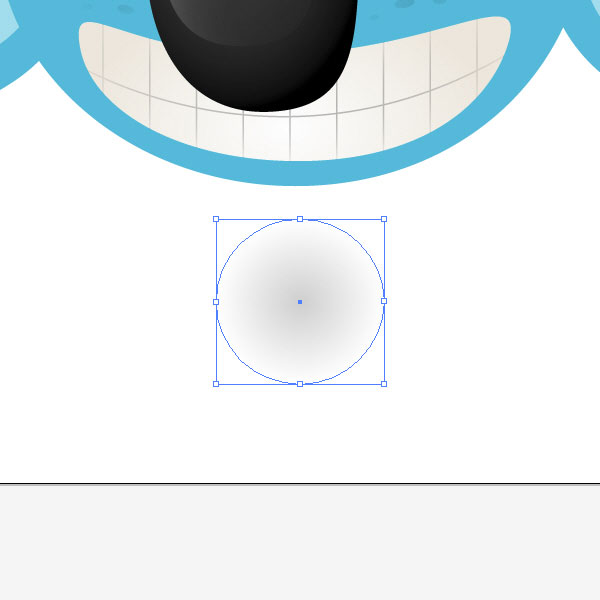
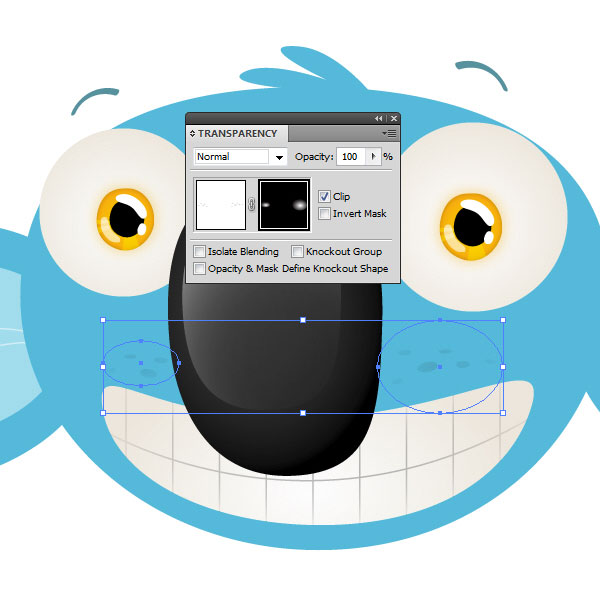
Step 22
Keep the circle selected and create an opacity mask. There are two check boxes next to the opacity mask: Clip and Invert Mask. First uncheck Clip, then create a black ellipse (L) over the first circle you made. Stretch it out slightly as shown and allow the bottom of the blurred first circle to peek out. The image demonstrates this. Exit the opacity mask.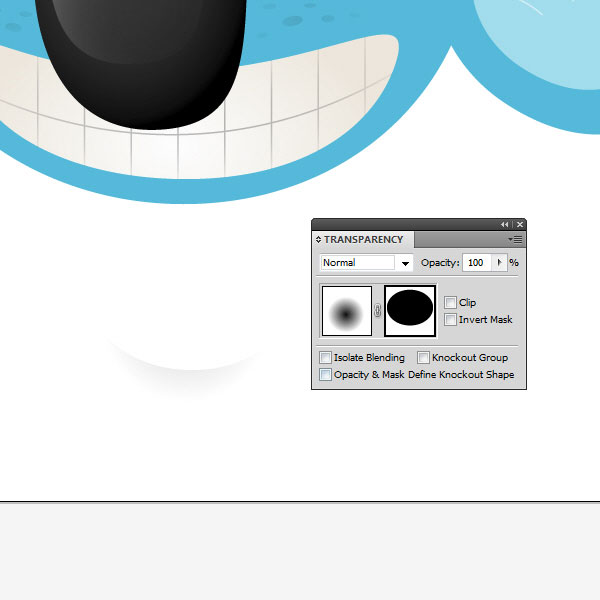
Step 23
What we have now is a stretchable, rotatable portion of shading that we can use to give depth to under the eyes and near the mouth. Place the shading underneath the eyes in such a way that the curves of each match smoothly.Adjust how much of the blurred circle is covered by the black circle within the mask to vary the strength of the shadow, and use the opacity levels to reach a subtle but effective level of shading.

Step 24
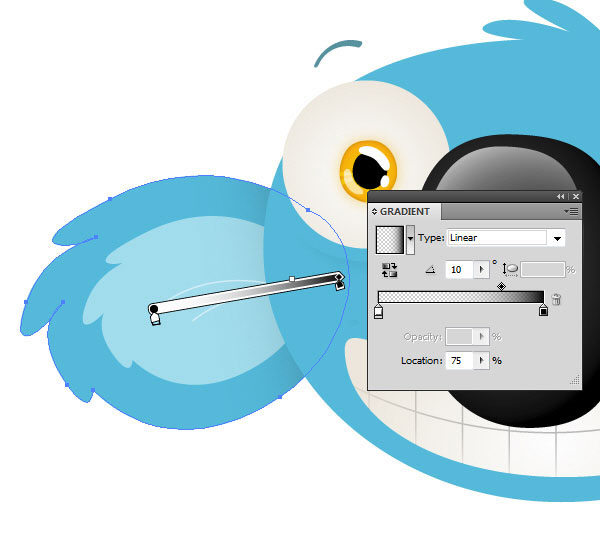
For the final touch, double-click the left ear group to enter the group in Isolation Mode, and select the larger ear layer. Copy it (Command + C) and exit Isolation Mode (Click the green arrow in the top left of the screen or double-click any unoccupied portion of the stage).Paste the ear in place (Command +F) and give it a Linear gradient, from white to black. Set the gradient’s angle to 10 degrees, and the diamond slider to 75%. Set the white to 0% opacity. In the Layers Palette, move this new ear layer down until it is below the “head” layer, and above the ears. Set it to Multiply and 60% opacity.
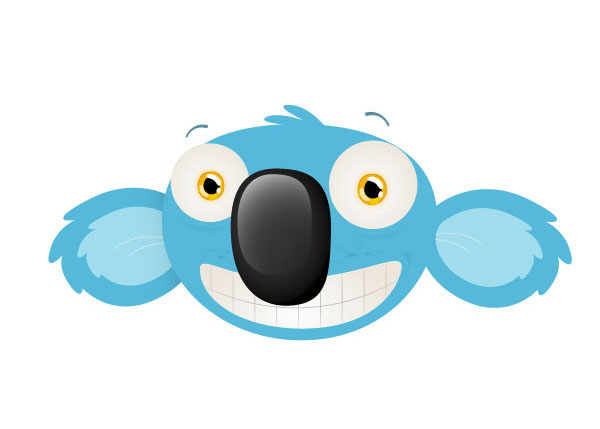
Conclusion
You are done! Try importing your character into Photoshop to give it a final global lighting and color adjustment; and/or to add other elements, like a background. Thanks for sticking through this tutorial!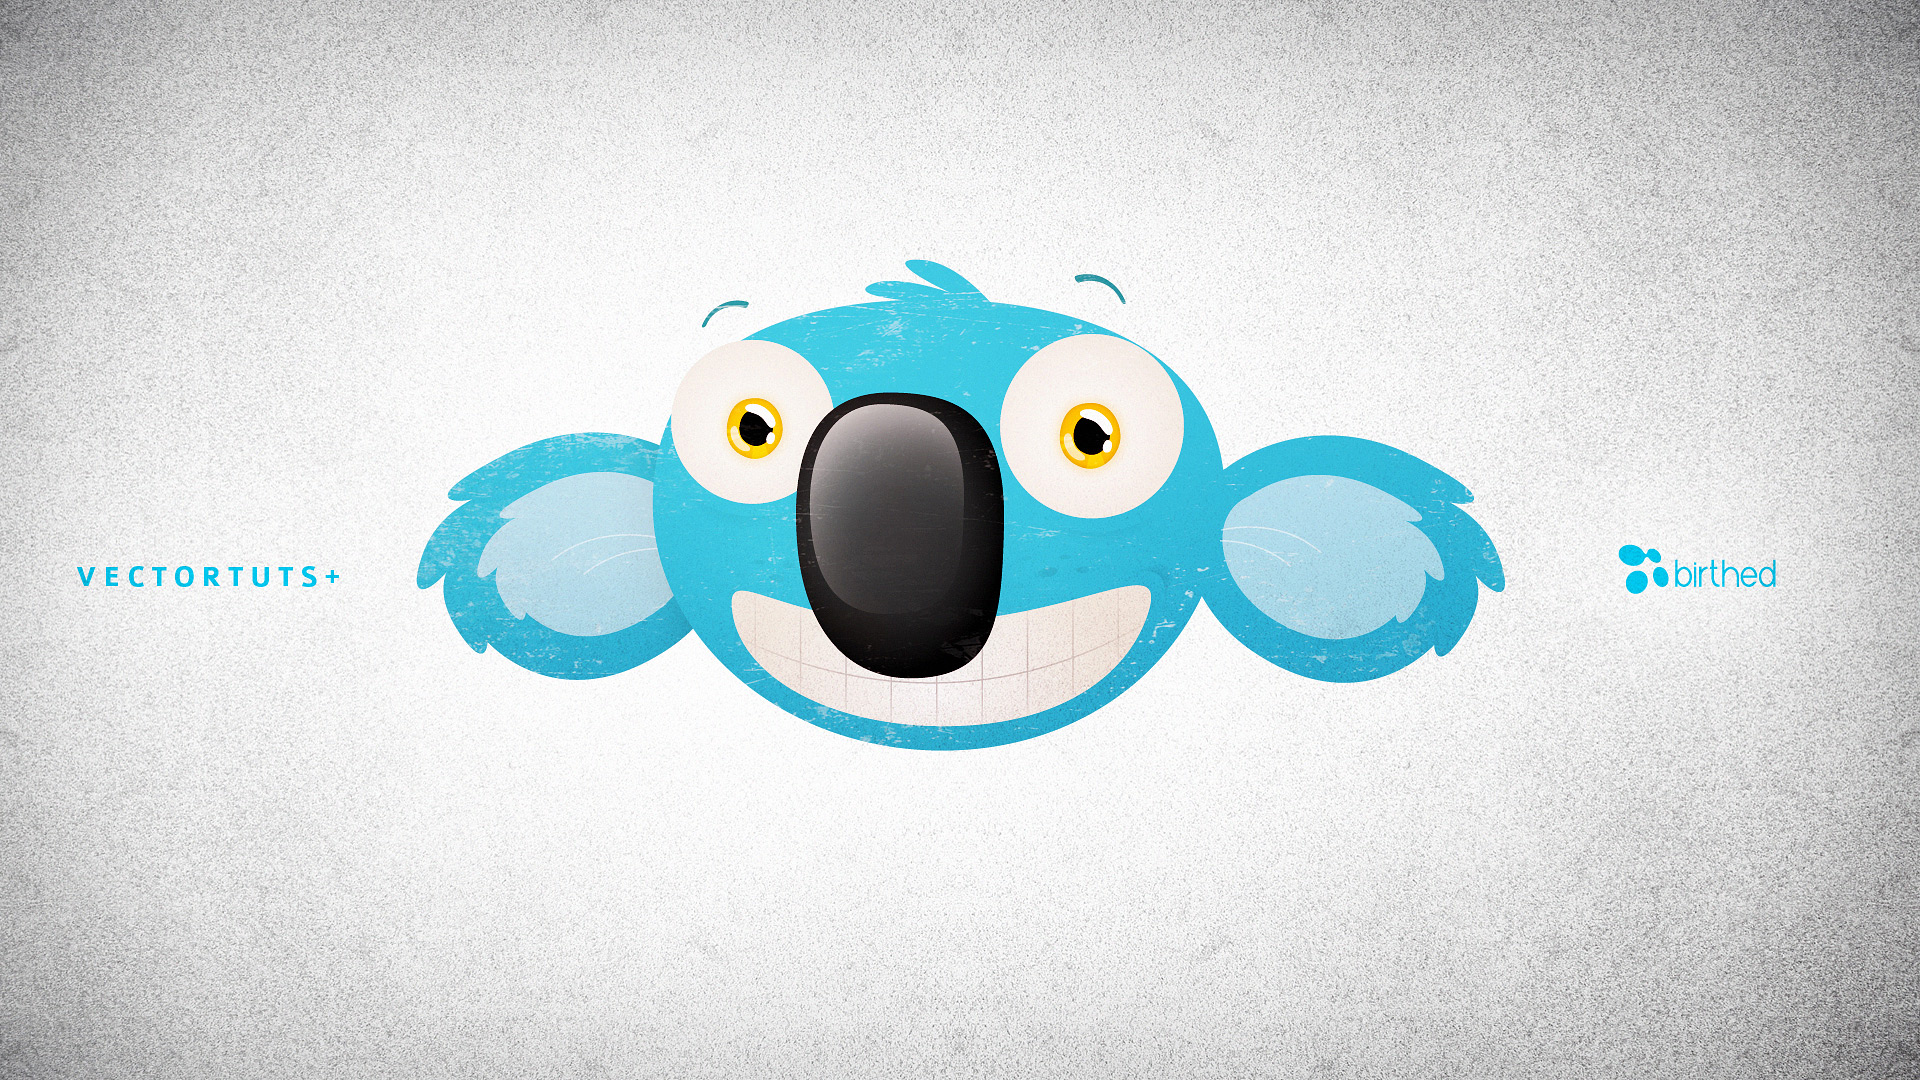

6 komentar on How to Design Koala with Adobe Illustrator :
Very helpful post. which illustrator version use in this work?
Clipping Creations India
Offshore Clipping Path
Arafin Media
This is actually a very helpful information for those people who wanted to gain a technique in creating simple ideas on how to make that kind of figure that looks attractive for a website.
I appreciate your idea here. http://awriter.org/ Definitely it has a good content. Thank you for imparting more of your own thoughts. Good job!
This is very much a work in progress whenever I find out about one who is more beautiful than any of these I will add thesis consulting her and kick out number ten Thanks for sharing the informative post.
This is a fantastic tutorial. I like to work with adobe illustrator.
Abdullah Allamin
You’ve presented this topic so clearly. It’s one of the best explanations I’ve come across.
Visit Here: photo retouching services
Post a Comment and Don't Spam!