Jari10 is the best blog to get more information about software, antivirus, linux, windows, games, android, madura, karapan sapi

Tampilkan postingan dengan label Software Tutorials. Tampilkan semua postingan

Simulator Ipad di PCmu dengan Ipadian

Ipad di Pc? Gimana caranya Ipad di PC ?
Yup, ini memang beneran gan, sekarang sudah ada simulator ipad agar bisa dijalankan di pc agan.
Ipadian adalah salah satu simulator untuk menjalankan ipad di pc anda.
Lumayan kan buat yang pengen punya ipad tapi gag kesampean karena harganya menggila :(
Juga bisa dipamerin keteman-teman kalian kalau di PC kalian ada Ipadnya, pada ngiri tuh :p

Screenshot Ipadian di PC :
Screenshot Ipad menggunakan Ipadian di Kaskus

Fitur-fitur Ipadian yang bisa kita dapatkan adalah :
-Full Screen preview
-Custom App Store
-Games
-Free music & videos
-Webkit browser
-Support Facebook notification & messages
-Social Chat

Requirements Spec PC anda untuk menjalankan Ipadian :
A PC with Windows 7/ Windows Vista/ Windows XP
2.8 Ghz Pentium 4 PC or more
512 mb of Ram or More
50 mb Disk space

Tips-Trik untuk Menggunakan Ipadian :
1. How to Add New backgrounds into iPadian ?
Some users Ask me how to add new backgrounds photos into ipadian , well it’s easy
Firstly go to iPadian directory
then open /assets/images and then open background Folder
into Background Folder there’s 13 photos named as m1.jpg …. mXX.jpg
delete all photos and add yours
rename all photos likr m1.jpg , m2.jpg …

2. How to Add new Apps to iPadian ?
Why u will keep using iPadian ? coz you can always add new apps (games, web apps , paint ..)
to do that open iPadian.exe and then click on App Store the first icon
a list of apps displaying for you chose one and click on to see detail
a live view of app is displaying if you like it click on the Green Button to install

3. Submit your web App to iPadian App Store
if you have a nice website or web app or game and you want to share it with all iPadian users
open App Store
on the top menu click on submit App
Fill the forme
and click submit, after review we could add your web app

Download
For Windows : http://code.google.com/p/ipadian/downloads/detail?name=iPadian.zip&can=2&q=
For Mac & Lunix (Adobe air) : ipadian.googlecode.com/files/iPadian.air

Nah daripada bengong nungguin Ipad dari langit, mending langsung install deh simulator Ipadian di Pc kalian.
Semoga bermanfaat ya.

Download Manager Untuk Android


Download Manager Untuk Android
Setelah habis membahas game-game di Android, sekarang saya share mengenai Downloader untuk Android.
Sering banget download? Download game , download lagu dll? Tapi sering putus?
Salah satu app terbaik menurut saya karena downloader ini mampu lebih cepat 3x daripada downloader bawaan browser.

Penasaran ? Pingin coba? silahkan download disini http://www.ziddu.com/download/18044695/faster.downloads.v1.5.2.apk.html

Langkah-langkah Untuk Menggunakan Downloader Android :
1. Install file downloader yang sudah di download.
2. Terus copy link nya yang mau di download dan ok

Nah segitu aja, gampang kan? Selamat Mencoba ya. salam jari10

Download Talk It Software Mengubah Bacaan Menjadi Suara

Baru saja tadi pagi melihat koran jawa pos. Di bagian depan ada yang berita menarik yang membuatku tertarik membacanya. Beritanya tentang seorang wanita buta yang sukses untuk membuat english competition untuk para tunanetra lainnya. Selain itu yang membuatku kagum adalah bagaimana dia bisa membalas sms dari karyawan jawa pos yang ingin mewancarainya dengan mata butanya itu. Ternyata dia menggunakan software di hpnya yang bernama talk. Nah maka dari itu saya akan meshare software semacam itu. Software Talk it ini dapat mengubah bacaan menjadi suara. Anda bisa memilih suaranya, apakah suara anak-anak, kakek, nenek ataupun robot software ini dapat melakukannya. Oke langsung saja link downloadnya ada dibawah ini.

Download Talk It 
Password = masterdhedi

Webpage Maker 3.2

WEBPAGE MAKER 3.2

Web Page Maker is really an easy-to-use web page design tool that enables you to create and upload a professional web page in short minutes without having to know HTML. Simply add text, images, photos, animation, navigation bar, flash, buttons, logos, and more onto web page and move them freely. It offersseveral pre-designed templates, so youcan easily create a new web page from them.

What's new in WEBPAGE MAKER 3.2:
* Improve the compatibility with Windows 7 and Windows Vista.
* Added: The ability to publish just changed files.
* Added: The ability to create a xml sitemap.
* Added: The ability to insert extra html code at some special postion.
* Added: The option to save image files as relative path.
* Added: The option to export high quality shape image.
* Added: The option to apply to all pages for page properties.
* Fixed: Sometimes the changes will not save.
* Fixed: Sometimes publisher missing a few files.
* Fixed: Image scanline error.
* Remember the main window's postion and size
* And minor bugs fixed.


Link Download Web Pagemaker 3.2
or


(keygen included)

How to create a Vector Penguin

Okay, now we will creat a cute vector penguin.
Follow this step by step Adobe Illustrator tutorial to create a simple vector penguin character. We’ll be using many of Illustrator’s basic shapes to create the structure of the character, which makes this tutorial great for beginners. We’ll then make use of various gradients to really bring the character to life with depth and dimension.

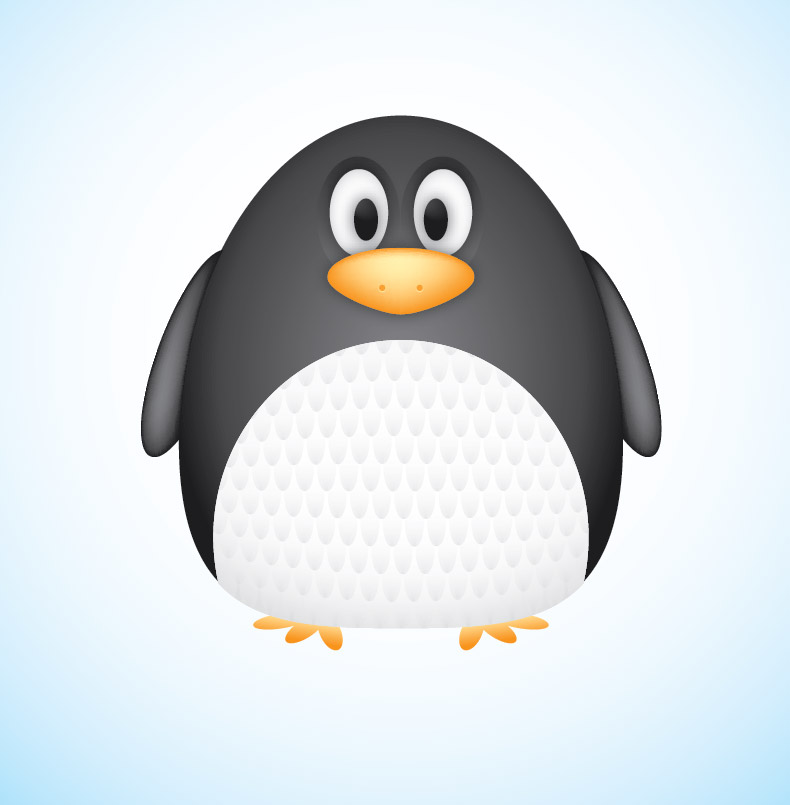
Vector Penguin character
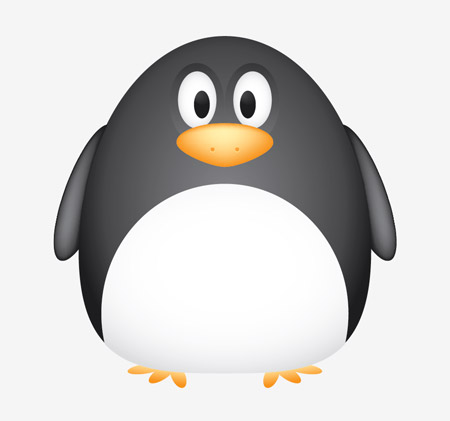
Here’s our cute little chubby penguin character we’ll be creating as part of this tutorial. The whole body is created from various circles and ovals which help give the penguin that cute and friendly appearance, while the gradients and shading help lift the character from the screen with a three dimensional illusion.

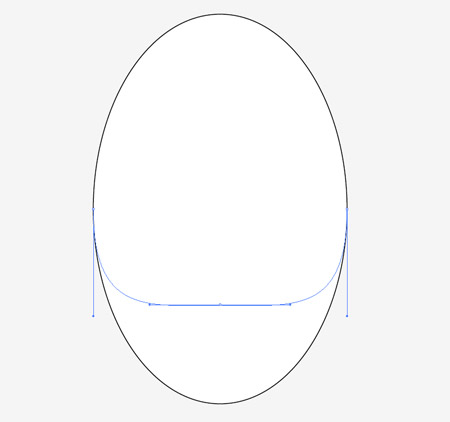
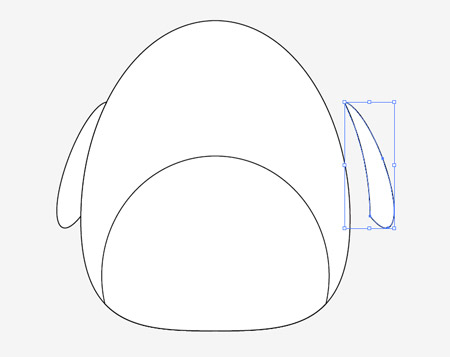
Open up Adobe Illustrator and draw an oval on the artboard, then select and drag the lower most point vertically upwards with the Direct Selection Tool.

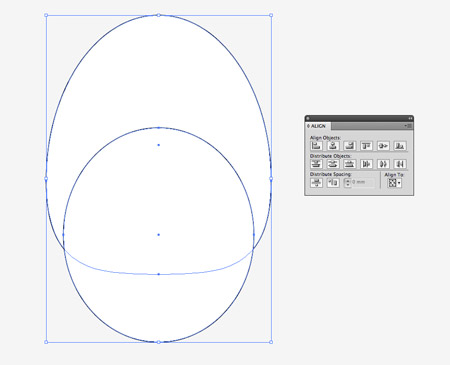
Overlap another oval shape to outline the belly fur, then align the two shapes centrally along the Y-Axis.

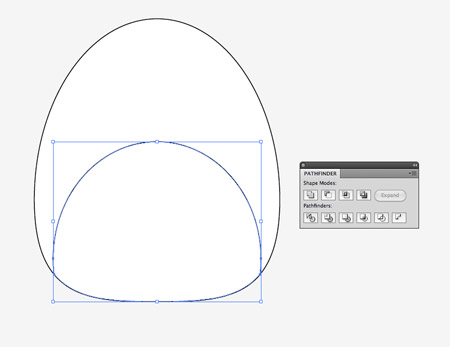
We’ll need to trim down this new shape so copy (CMD+C) and paste in front (CMD+F) a duplicate of the original body outline and send it to the top (CMD+Shift+]). Select this duplicate along with the belly shape and hit the Intersect option from the Pathfinder palette to trim it to size.

Draw another oval to act as a wing. Paste in another copy of the body and use it to trim down the wing shape.

Copy and paste another wing onto the artboard then go to Object > Transform > Reflect. Position the new wing on the opposite side of the body.

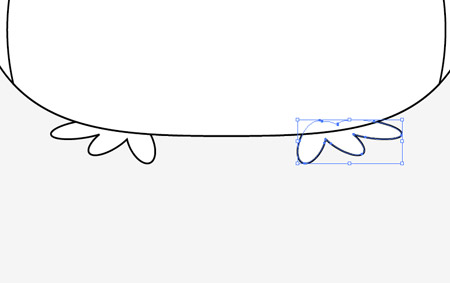
Draw a basic foot using three angled ovals. Merge them all together with the Pathfinder palette, copy, flip and position a duplicate on the other side.

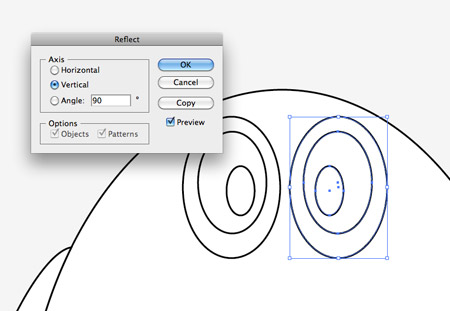
Create an eye using three differently sized circles. Offset the pupil to give the penguin a cute dazed look. Copy, paste and flip a duplicate of the eye shapes and position them next to the originals.

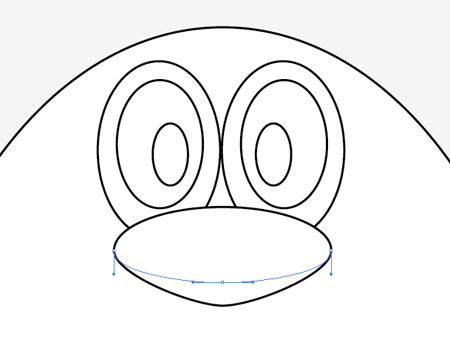
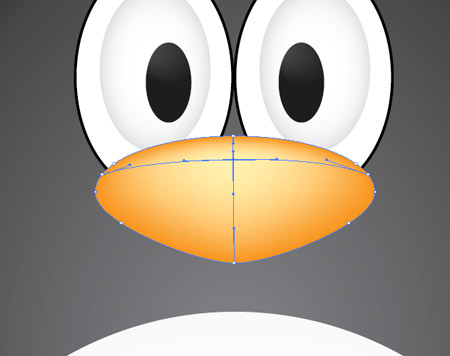
Use another oval as the penguin’s beak, but drag the lower most point downwards and adjust the bezier handles to make a slight point on the lower edge.

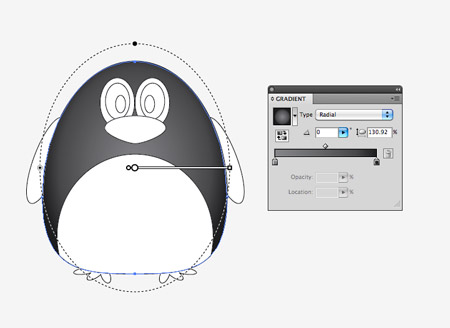
Now the basic structure and linework is complete we can begin bringing the character to life with colour. Replace the default fill and stroke with a grey to black gradient then adjust the angle so it flows radially from the centre of the body.

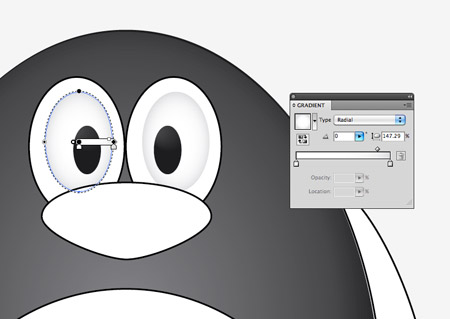
Give the eyes a subtle gradient of their own using a soft grey to white. Adjust the gradient shape to match the outline of the eyeball.

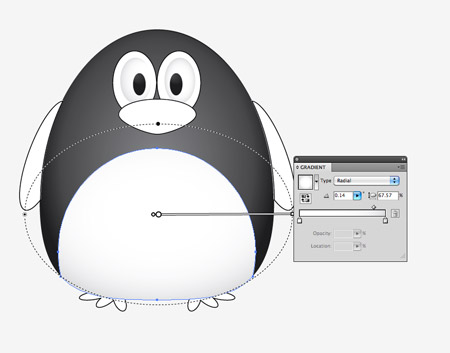
Use a similar grey to white gradient on the belly shape. Adjust this gradient so the lower portion has more grey shading to give a three dimensional appearance.

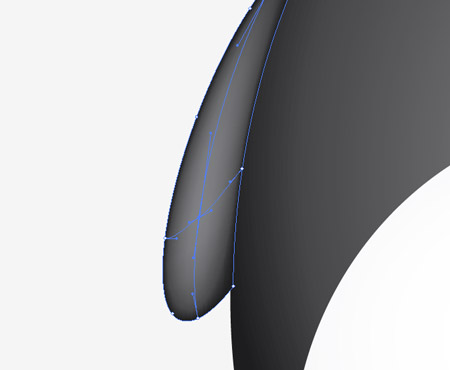
For the wings we’ll use the Gradient Mesh tool. Fill the wings with black first of all, then make a single click in the lower portion of the wing. Select a lighter shade of grey to add this colour to the gradient mesh point. Illustrator will automatically flow the gradient across the shape.

Add another gradient mesh to the beak, but this time start with an orange base colour and add a light yellow tone near the top edge to act as a highlight.

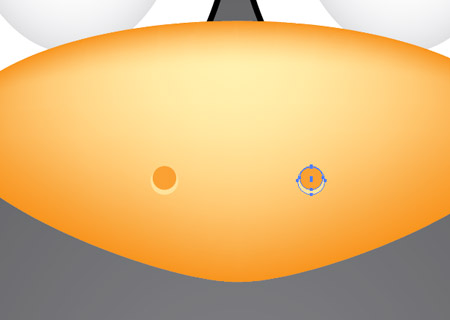
Create a couple of nostrils by overlapping two circles. The bottom circle should be the lighter yellow tone to create a kind of highlight effect.

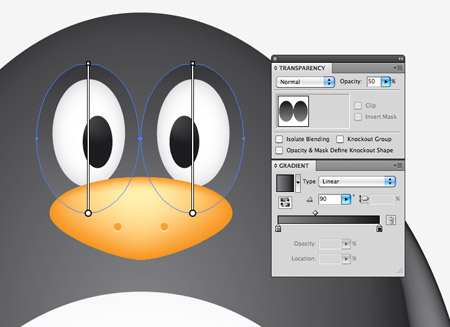
Add the grey to black gradient to the two remaining circles around the eyes as linear gradients, then reduce the opacity to around 50%.

Our penguin is really starting to come to life now it has colour, but there’s a couple more little touches that will help add more definition.

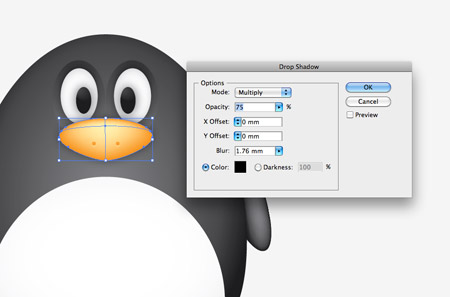
Select the beak and eyes then go to Effect > Stylize > Drop Shadow. Alter the offset to zero then add the effect.

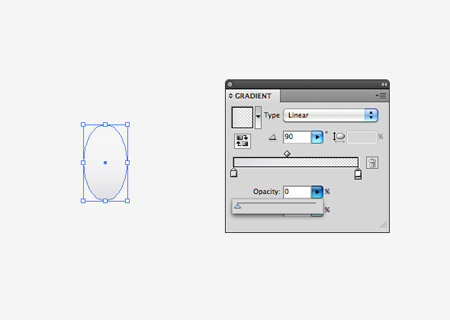
Elsewhere on the artboard draw a small oval with a grey to transparent linear gradient fill.

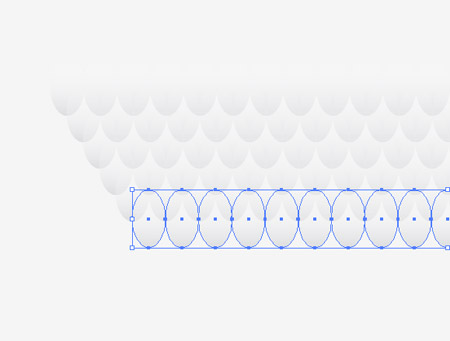
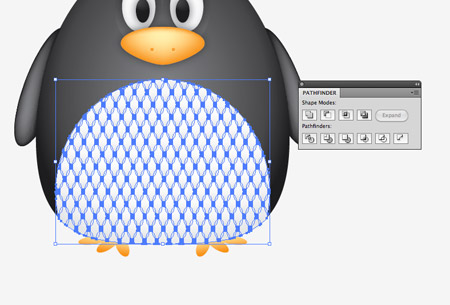
Hold Shift and Alt to drag a duplicate horizontally, then repeatedly press CMD+D to create a complete line. Hold Alt while dragging a copy of the whole line to create an offset row, then press CMD+D until you have a whole series of patterned shapes.

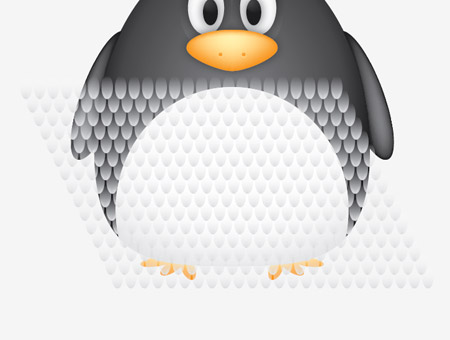
Group all the shapes together then overlay them over the penguin’s belly area. We’ll need to copy the belly shape to use as a tool with the Pathfinder so press CMD+2 to lock the pattern shape so you can select the underlying elements.

Paste in the belly duplicate and send it to the top (CMD+Shift+]), then with both elements selected (CMD+Alt+2 to unlock all) hit the Crop button from the Pathfinder palette.

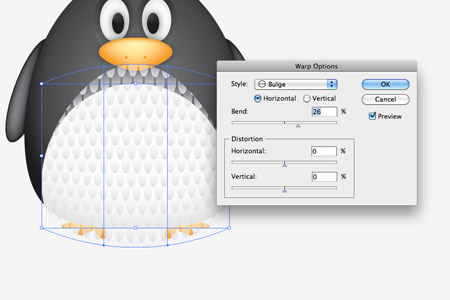
Go to Object > Envelop Distort > Make with Warp and select the Bulge effect. Adjust the setting to give the feather pattern a more three dimensional appearance.

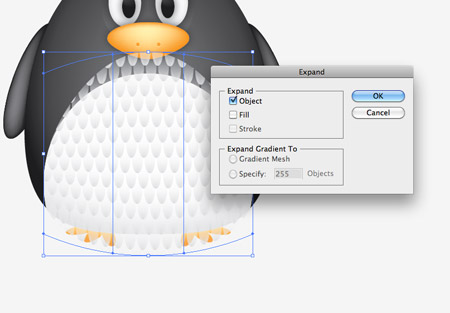
Convert the envelope distort effect to solid shapes by heading to Object > Expand and selecting just the Object checkbox.

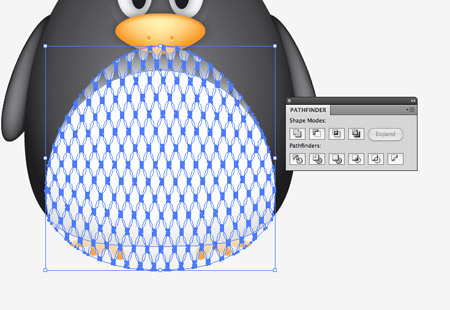
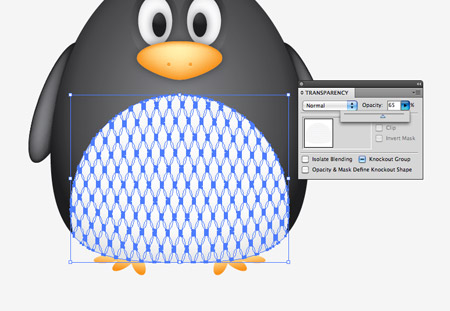
The pattern has broken out of the original belly outline, so paste in another copy of the shape and repeat the Crop function from the Pathfinder to trim everything back to size.

Adjust the opacity of the feather pattern elements so they add to the detail of the character but aren’t too overpowering.
Vector Penguin character
Our cute vector penguin is now complete. We’ve managed to create a whole character using nothing other than circles and ovals, with the help of gradients and shadows to add a touch of depth and dimension to the design.

How to Design Monster Character with Adobe Illustrator

How to Design Monster Character with Adobe Illustrator 
Previously, We have post about How to design koala 
Now we will share about How to Design Monster Character with Adobe Illustrator
Equipment : Adobe Illustrator CS 5
Steps :

Illustrator Monster Character
21.gif
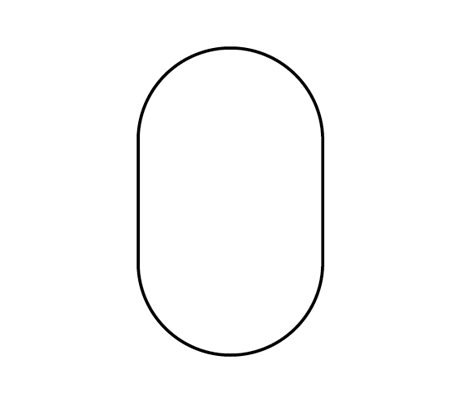
Launch up Adobe Illustrator, select the Rounded Rectangle Tool and draw a shape as shown. Use the cursor keys to adjust the roundness of the corners to give almost circular ends.
32.gif
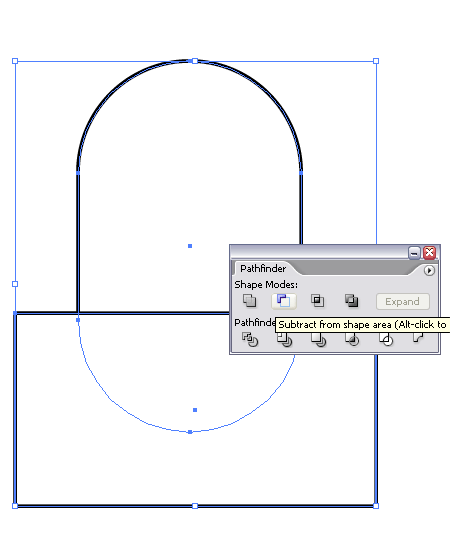
We don't need the bottom half, so create a rectangle to cover the area to chop off. Select both the shapes and use the Substract From Shape Area option from the Pathfinder Window and click Expand.
42.gif
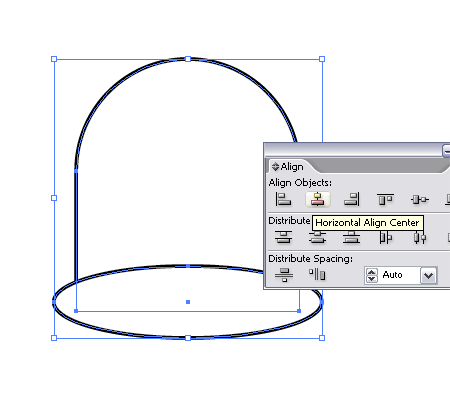
Use the Circle Tool to create an ellipse for use as the sucker part of the monster. Align these two shapes centrally.
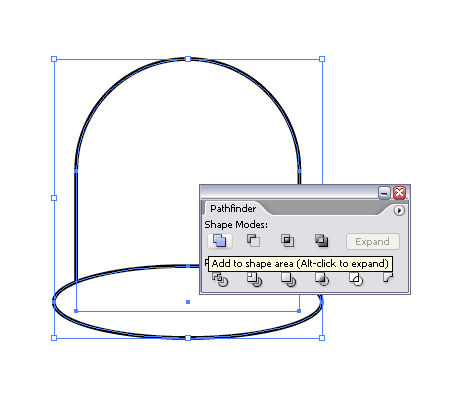
Use the Pathfinder Tool to Add To Shape Area, and Expand. This merges the objects together into a complete shape.
52.gif
Continuing with the Circle Tool draw a large circle as an eye, copy and paste in front (CTRL + F) then scale down whilst holding shift and alt. Repeat this again and fill the final circle with black. Use the same process to create the second eye.
Remember this character is quite dumb so creating different sized eyes both wide open will express a brainless, vacant stare.
62.gif
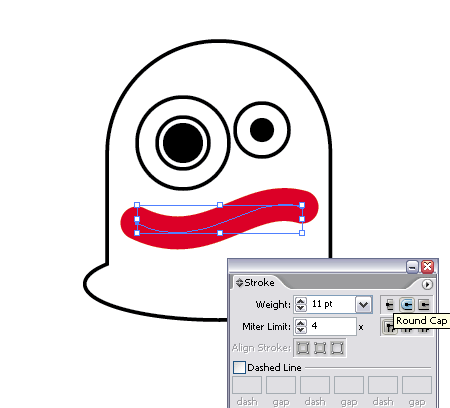
To further enhance his characteristics create a curved line for use as the mouth using either the Pen or Pencil tool; a wobbly shaped mouth expresses confusion which is perfect for this character. Add a thick red stroke to this line to simulate the lips, and add rounded edges by checking the Round Cap icon.
72.gif
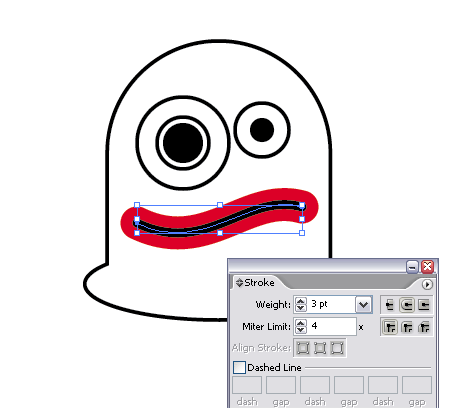
Copy and Paste this line but give a much thinner, black stroke to make the mouth opening.
82.gif
Create small tabs with the rounded rectangle for use as the teeth. Make duplicates of these and position them equally across the mouth, rotating each one slightly to follow the curvature of the line.� Use CTRL/CMD + [ and CTRL/CMD + ] to alter the order of the objects to make the black stroke the front most object, hiding the top half of the teeth underneath it.
102.gif
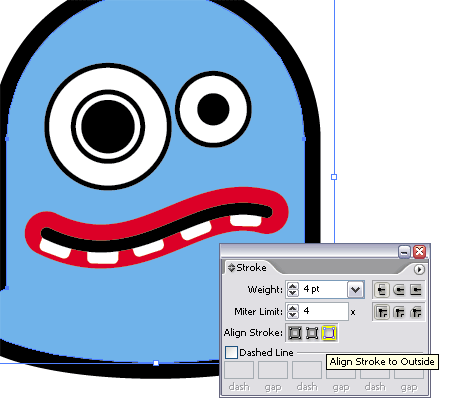
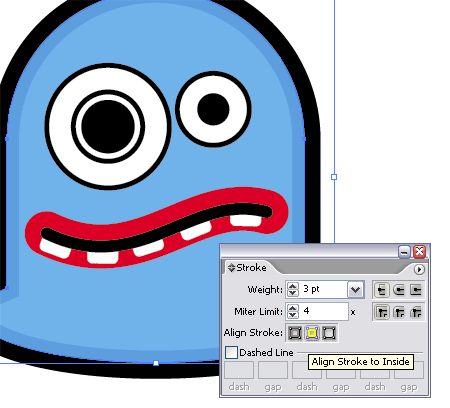
Bring in some colour by adding a blue fill to the body shape. Copy and Paste this shape, but exchange the fill and stroke to a dark blue stroke aligned to the inside of the object.
112.gif
122.gif
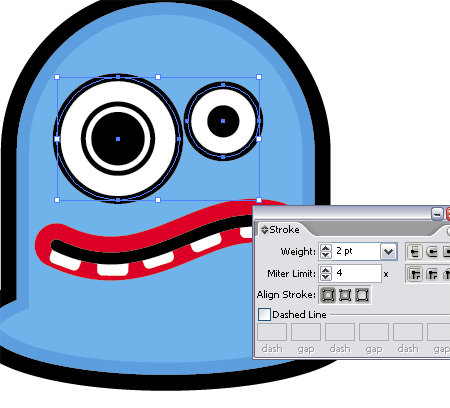
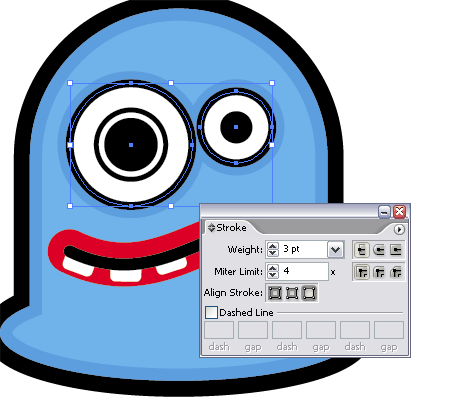
Thickening the strokes on the eyes gives more definition, enabling them to stand out.
132.gif
Copy and Paste Behind (CTRL + B) the eyes and add a dark blue stroke to the outside of the circles.
142.gif
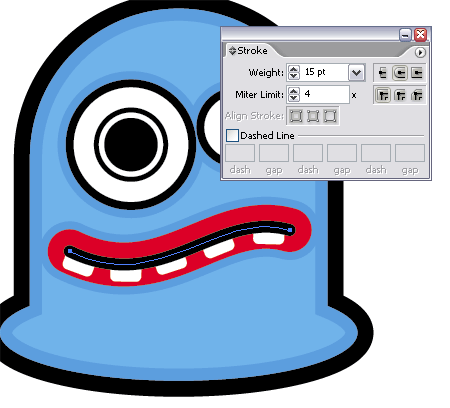
Repeat this process with the red mouth line, paste behind and change the stroke to a thick blue outline.
151.gif
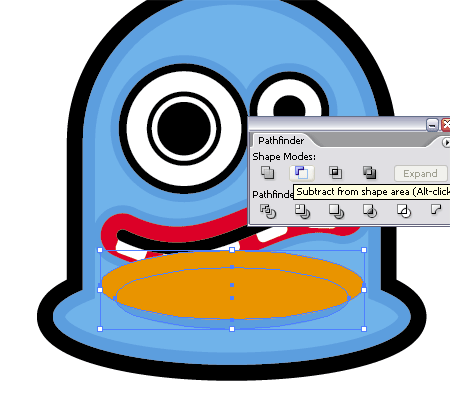
Give more definition to the sucker part of the monster by adding a subtle shadow. Draw a blue ellipse with the Circle Tool.
161.gif
Create a slightly larger ellipse as a tool to remove an area of the underlying circle. Use the Substract From Shape Area tool and Expand to leave a thin crescent shape.
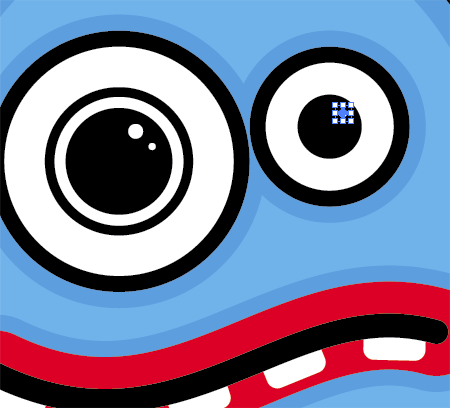
171.gif
Finally add some small circular highlights in the monsters eyes to give a glazed appearance.
181.gif
Illustrator Monster Character

How to Design Koala with Adobe Illustrator

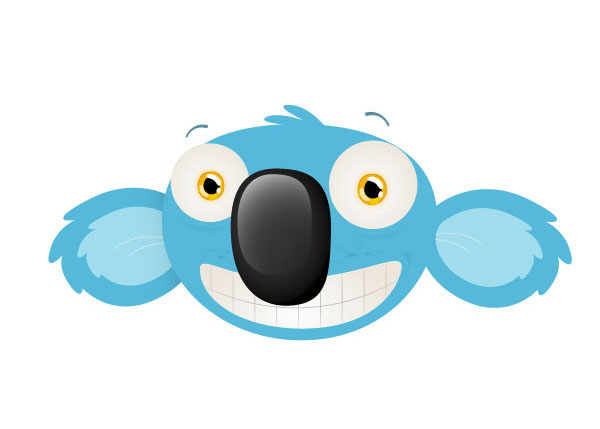
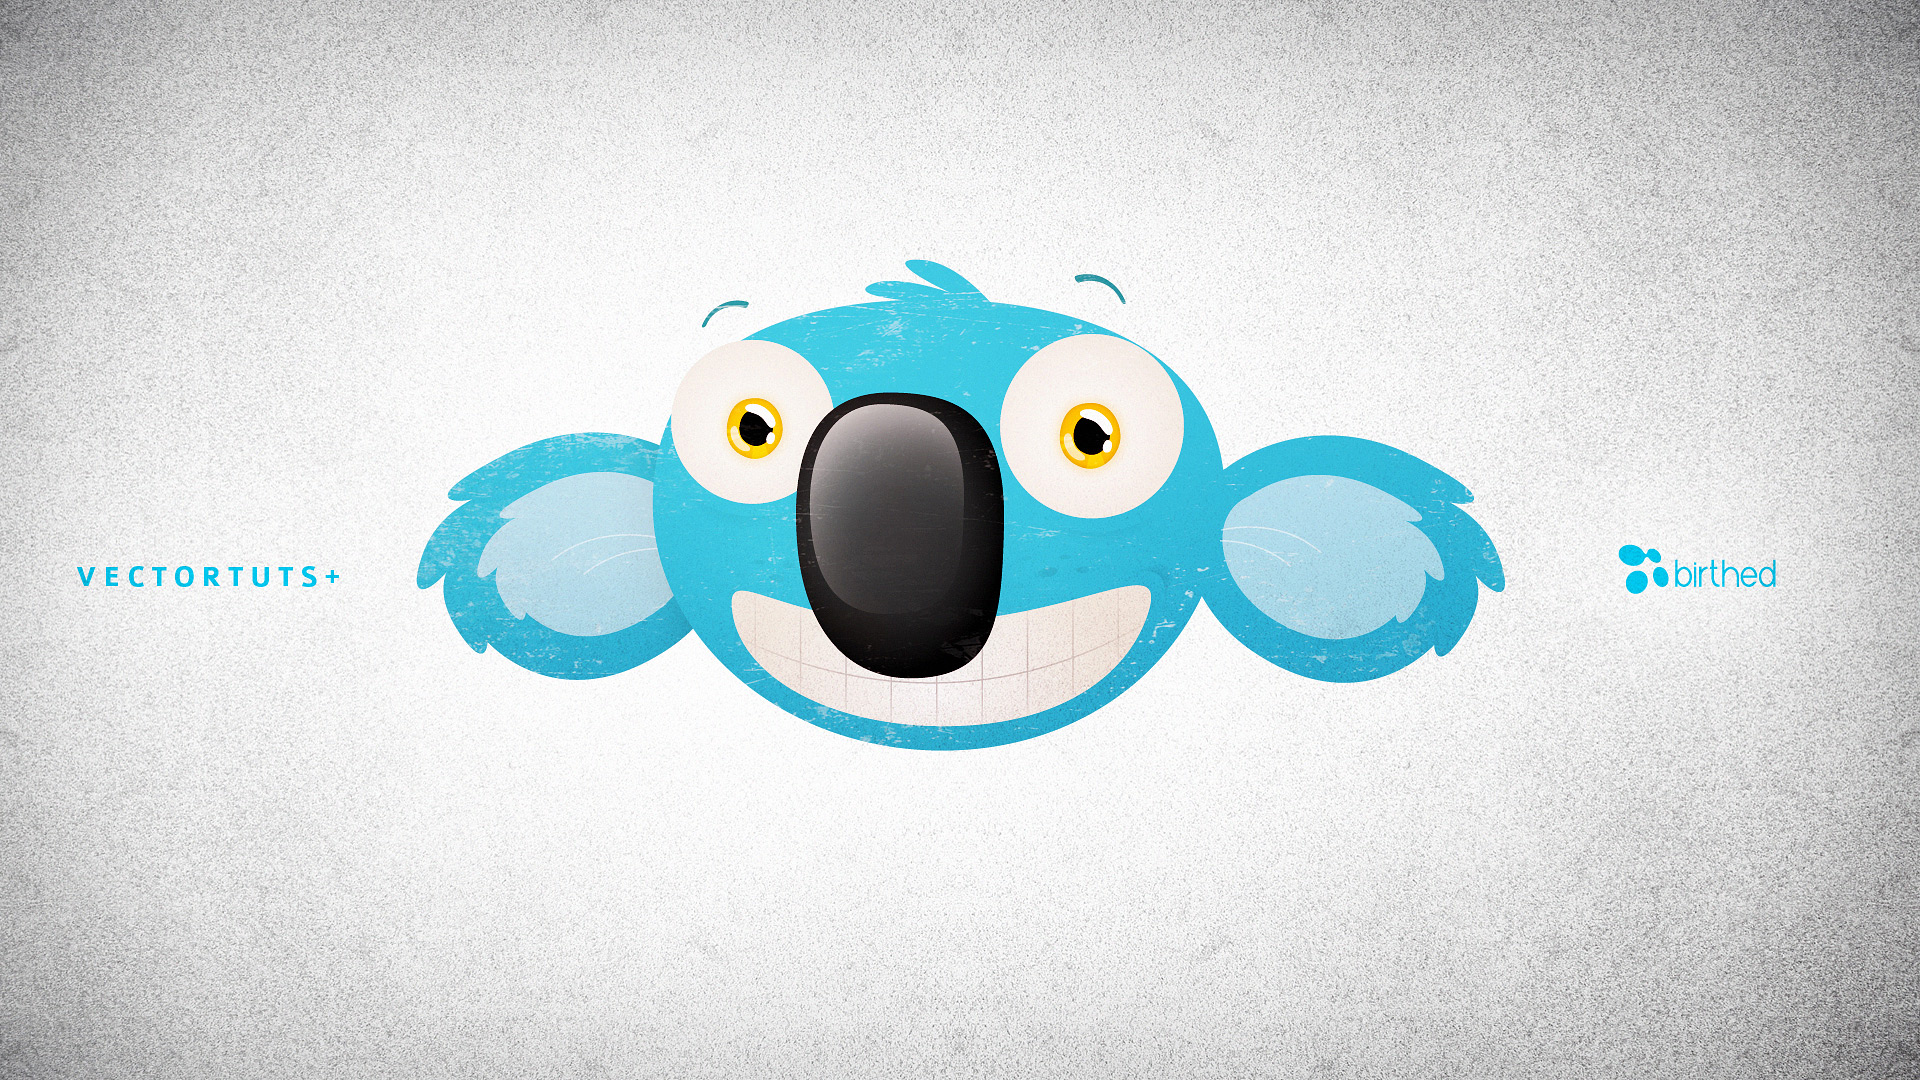
We’re going to put those vector eyes you learned how to make not long ago to some good use! This tutorial will show you how to combine basic shapes with some clever coloring and blending to make a fantastic looking koala character.
We’ll use some opacity masks, brushes, gradients and effects, in addition to an easy shading technique you’ll find yourself using in plenty of other projects. Get ready to tuck into this Aussie-flavored tut!


Step 1

Open a new 900px by 700px document, set it to RGB, at 72 dpi. Let’s start by creating the basic head shape! We are using blue as our base color here, but obviously color choice is entirely up to you. Be sure to save (Command + S) with each step. By double-clicking Fill on the color Palette (F6), change the fill color to a nice blue; we used #33BBDB.
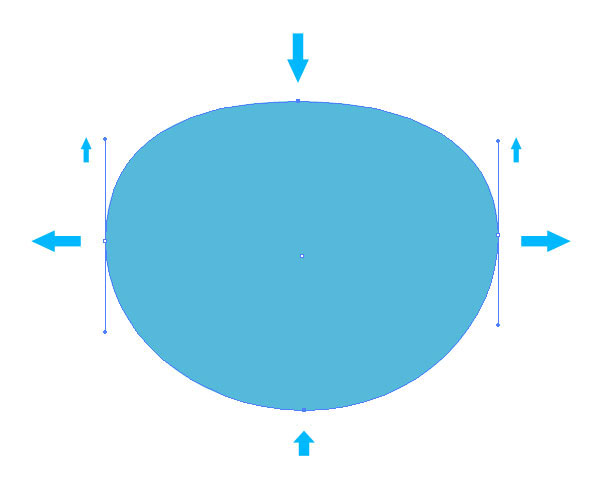
With the Ellipse Tool (L) selected hold Alt + Shift and drag out a circle in the middle of your document. Using the Direct Selection Tool (A), move the top point down and raise the two side point’s upper handles to create the shape below.

Step 2

To get into a good habit from the outset, let’s name our layers! We will suggest layer names at the beginning, but we encourage you just to use whatever makes sense to you. In your Layers Palette double-click “Layer 1″ and name this layer "koala."
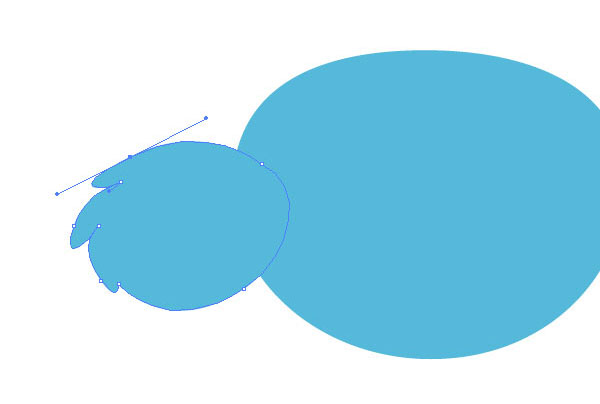
Click on the small white arrow next to the thumbnail to show the paths of this layer. Double-click the path you just created and name this layer "head." Using the Pen Tool (P) we are going to create a shaggy ear. Here is a great resource to gain familiarity with the Pen Tool, if required. Name this layer "ear L."

Step 3

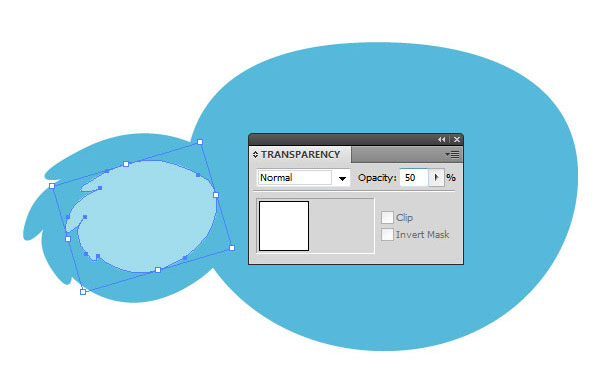
To create an inner ear simply select "ear L", Copy it (Command + C) and Paste it in place (Command + F). Change the Fill to White. Bring up the Transparency Palette (Shift + Command + F10) and change the Opacity to 50%. Name the layer "inner ear."

Step 4

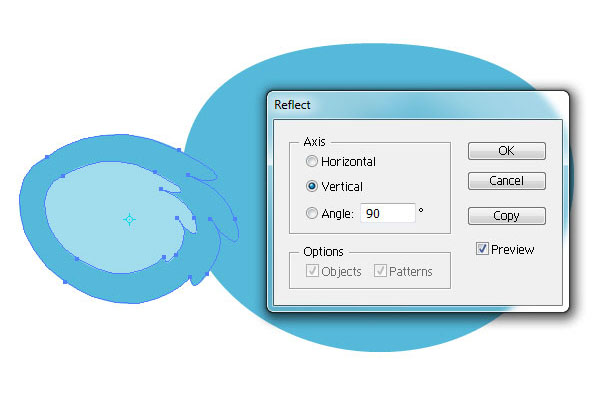
Select both ear layers and Group them (Command + G). Name this group "ear L." Choose the Selection Tool (V) and select this group. Ensure that the Reflect Tool is selected (O) and double-click its icon on the toolbar (below the Eraser). This will bring up the Reflect Dialogue box. Select Vertical as the axis and choose Copy. This will create a vertically flipped copy of the ear.

Step 5

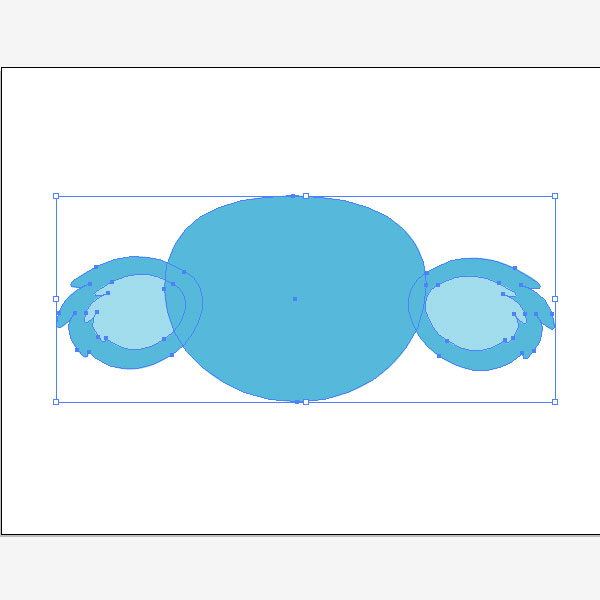
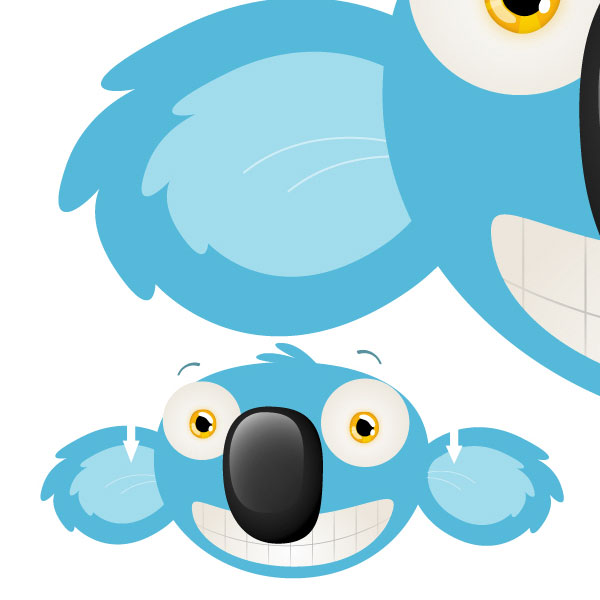
Using the Selection Tool (V), move the flipped ear over to the other side of the head and change its name to "ear R." In your Layers Palette move the "head" layer above both ear layers.  Notice that the left ear is positioned closer to (or further behind) the head than the right – this will give our koala’s head some dimension by giving the illusion of roundness.

Step 6

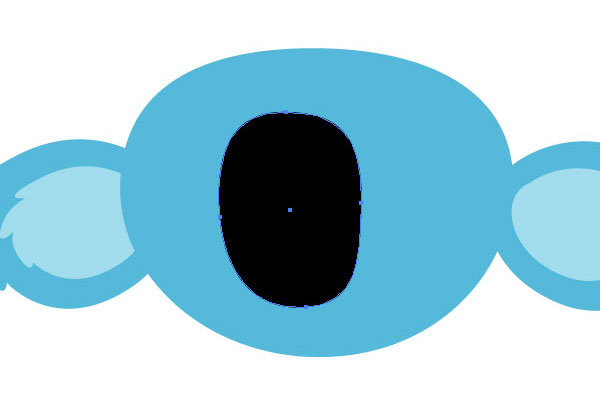
Next let’s make the nose! As with the head, start with the Ellipse Tool (L) and create a perfect circle (hold Alt + Shift) in the middle of the head. Change its Fill to Black and name it "nose."
Use the points and handles as before to create a squarish koala-esque nose. The key here is to raise and lower the top and bottom points of the circle, move the two side points in towards the middle and stretch out the handles of each point until you have something that looks like the image below.

Step 7

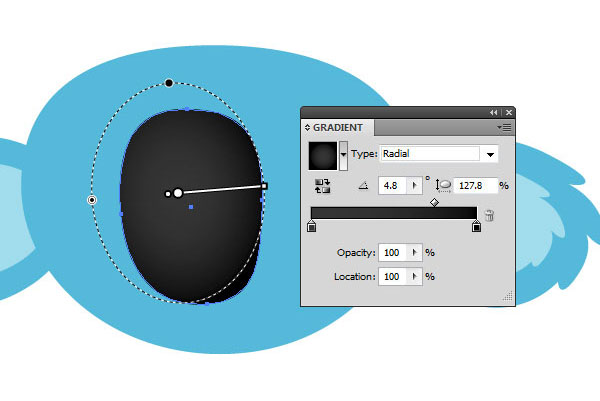
Give the nose some depth by giving it a black to gray gradient. To do this select the nose shape, bring up the Gradient Palette, select Radial as the gradient Type and double-click the first color slider to change its color to gray (R=50, G=50, B=50) and the other black (R=0, G=0, B=0).
Now move the small diamond slider in the middle to a Location Value of 75% (towards black). This will increase the area of the gray on the nose. To conform the shape of the gradient to the nose, select the Gradient Tool (G) and make adjustments as shown below.

Step 8

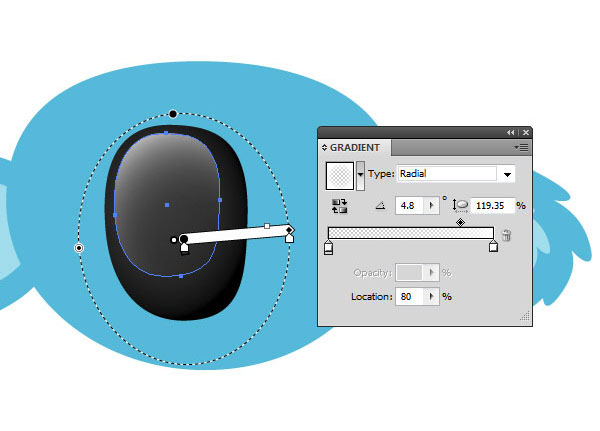
To give the nose a bit more life (it looks quite flat and dull) we will add a very simple reflection. Copy (Command + C) the nose and Paste in place (Command + F). Using the Selection Tool (V), resize and reposition the shape up towards the top left of the nose.
Head back over to the Gradient Palette and change the first slider from gray to white and change its opacity to 0%. Change the other from black to white. Change the location of the diamond slider to 80%. Using the Gradient Tool (G) position the gradient as demonstrated below.

Step 9

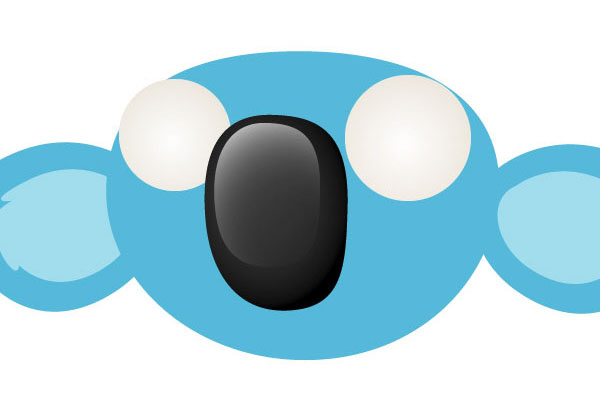
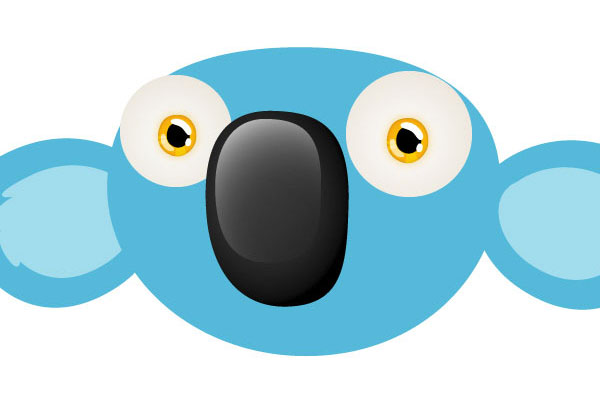
Now for the eyes. Create a perfect circle using the Ellipse Tool (L) next to the nose and give it a radial gradient of white (R=255, G=255, B=255) to beige (R=237, G=231, B=221). Duplicate (Command +C an Command +F) this circle, move it over to the other side of the nose and make it slightly smaller. Move these two layers below the nose in the Layers Palette and name them appropriately.

Step 10

These eyes need irises, and we’ll be using our previous tutorial Create a Set of Shiny Character Eyes to make these. Again, you can choose any color – here we have used orange. Place your irises as shown below.

Step 11

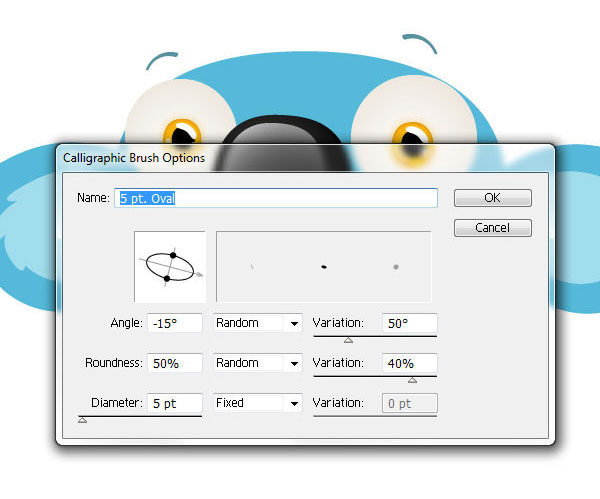
Some quick eyebrows can be made easily by using one of the default calligraphic brushes from the Brushes Palette (F5) with the settings shown below. Use the Brush Tool (B) to draw one eyebrow, Undo (Command +Z) and redraw until you are happy with the result.
Use the Selection Tool (V) to select the eyebrow, go to Object > Expand Appearance. Change the color to #007787, then use the same method as with the ear to vertically flip the eyebrow and move it over to the other eye.

Step 12

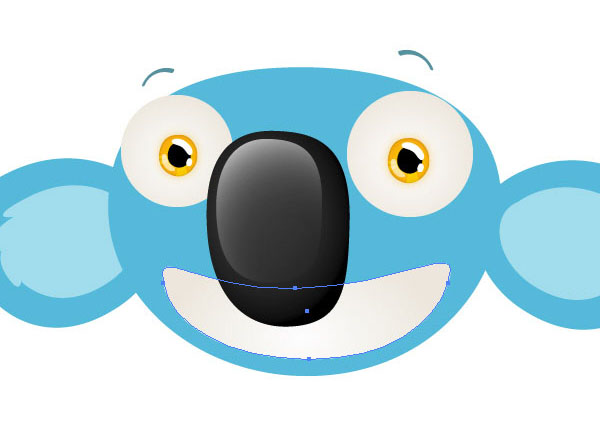
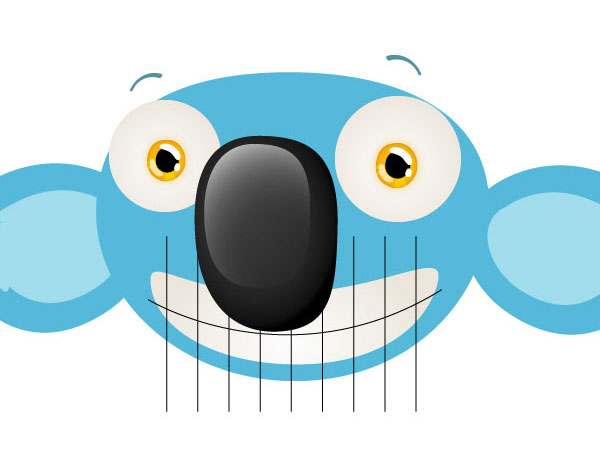
The mouth is probably the most complex part of this tutorial, and it’s really quite straightforward. Start by creating an ellipse under the koala’s nose, much like a sausage shape, using the Ellipse Tool (L). Edit its points until you have something like the image below. Use the Eyedropper Tool (I) to grab the gradient from one of the eyes – this’ll do nicely for our mouth.

Step 13

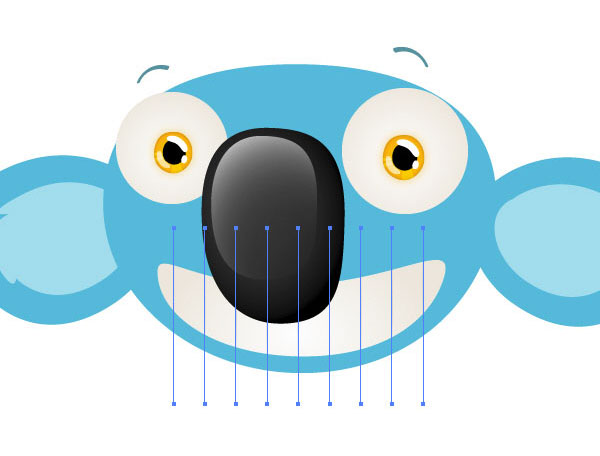
Next, using the Line Segment Tool (\), create a single line near the left of the mouth with a Black, 1pt Stroke. Use the Stroke Palette (Command + F10) to change these settings.
Now select the line and while holding Alt + Shift, drag a duplicate of that line one tooth-distance over. It’s up to you how large your characters teeth are! Now press Command +D (Transform Again) to have Illustrator automatically repeat your last action, until there are an appropriate number of teeth lines across the mouth. Group these lines (Command + G).

Step 14

Using the Pen Tool (P) add a curved line from one edge of the mouth to the other, with the same stroke settings as the other lines. Group this with the other lines and call this group “teeth.” You should have something like the image below.

Step 15

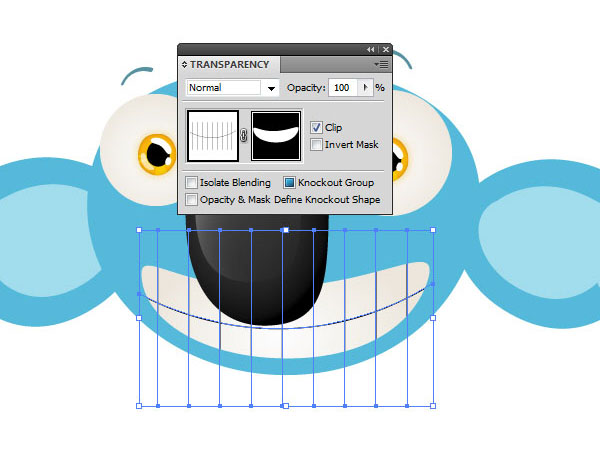
Let’s create an opacity mask, to conform the teeth to the shape of the mouth. Select the mouth and Copy it (Command + C). Then select the teeth group, open your Transparency Palette (Shift + Command + F10) and double-click the empty space next the group’s thumbnail image. Your teeth lines will disappear and a black square will appear where you clicked. Paste in place (Command + F) to bring the mouth shape up, and change its Fill color to white. This reveals your teeth group once again. You can exit the opacity mask by clicking on the thumbnail next to the mask.

Step 16

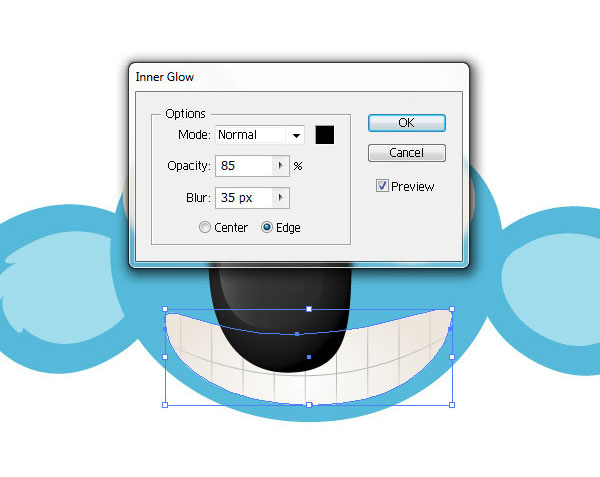
To soften the lines of the teeth, drop the Opacity of the teeth group to 40%. Then, entering the mask again, select the mouth shape and apply Effect > Stylize > Inner Glow. Ensure the settings are as below, and the mouth is done!

Step 17

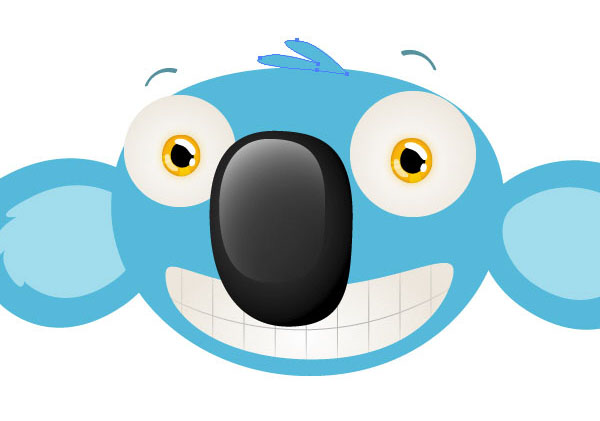
We are nearly finished, just a few final touches! With the Pen Tool (P) give your koala some hair, to make him/her a little cuter.

Step 18

Using the Pen Tool (P) again, draw a curved line as shown below, with a stroke color of white and 1pt thickness. Set the Opacity to 50% and duplicate it four times to look like the image below.

Step 19

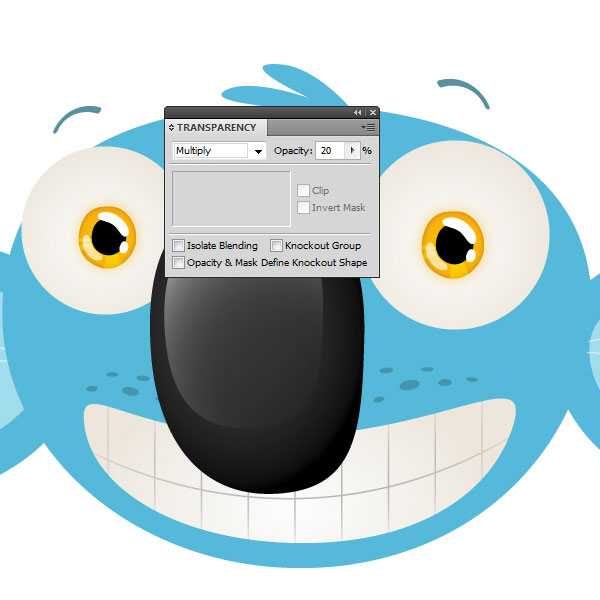
For some freckles create a series of small ellipses on the cheeks of the koala using the Ellipse Tool (L) and Selection Tool (V). Group them and change the Fill color to black, Blend Mode to Multiply and Opacity to 20%.

Step 20

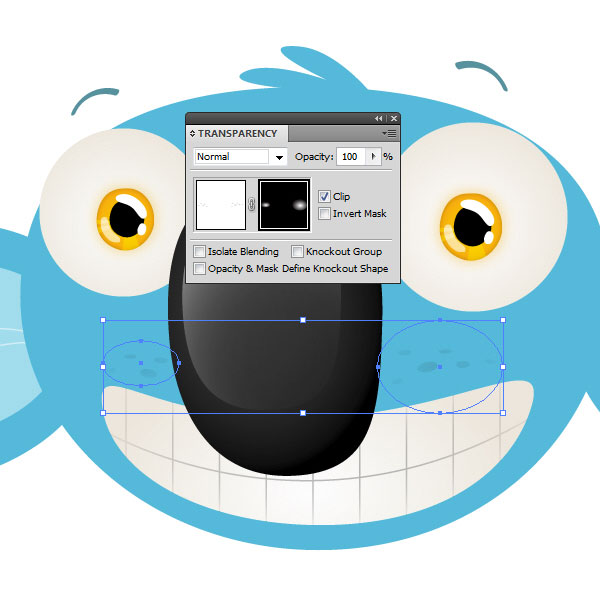
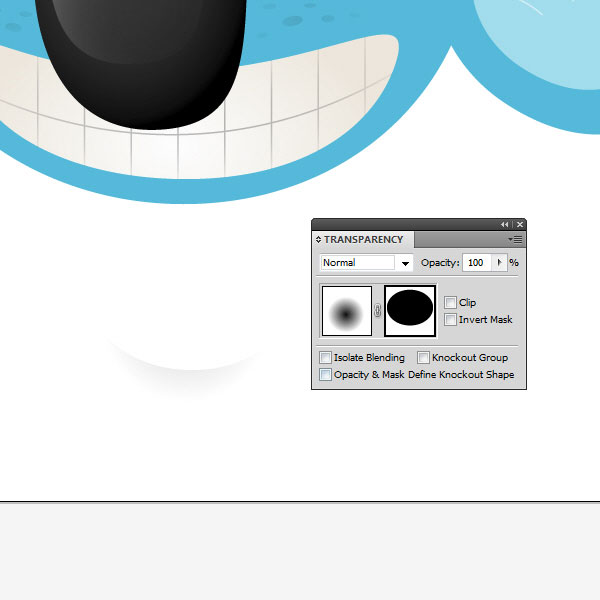
Soften these freckles by selecting the group and creating an opacity mask (as before, double-click the area on the Transparency Palette next to the thumbnail). This time create a circle with the Ellipse Tool (L) and give it a radial black to white gradient.
Duplicate this and position the two circles over the freckles as shown below. Notice the blurred white dots on the opacity mask – this is how your gradient circles should appear. Leave the opacity mask.

Step 21

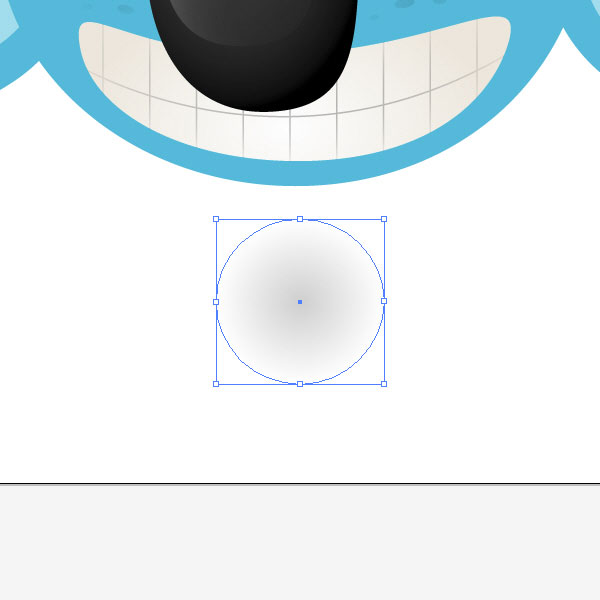
Our koala is rapidly nearing completion; we’ll just add some subtle shading. The method we’ll use here is a nice technique that you can use easily for other projects. Simply create yet another ellipse anywhere on the stage – approximately as big as one of the eyes. Jump to your Gradient Palette and give it a black to black radial gradient, and set the second slider’s opacity to 0%. Set the circle’s Blending Mode to Multiply and the Opacity to 20 – 30%.

Step 22

Keep the circle selected and create an opacity mask. There are two check boxes next to the opacity mask: Clip and Invert Mask. First uncheck Clip, then create a black ellipse (L) over the first circle you made. Stretch it out slightly as shown and allow the bottom of the blurred first circle to peek out. The image demonstrates this. Exit the opacity mask.

Step 23

What we have now is a stretchable, rotatable portion of shading that we can use to give depth to under the eyes and near the mouth. Place the shading underneath the eyes in such a way that the curves of each match smoothly.
Adjust how much of the blurred circle is covered by the black circle within the mask to vary the strength of the shadow, and use the opacity levels to reach a subtle but effective level of shading.

Step 24

For the final touch, double-click the left ear group to enter the group in Isolation Mode, and select the larger ear layer. Copy it (Command + C) and exit Isolation Mode (Click the green arrow in the top left of the screen or double-click any unoccupied portion of the stage).
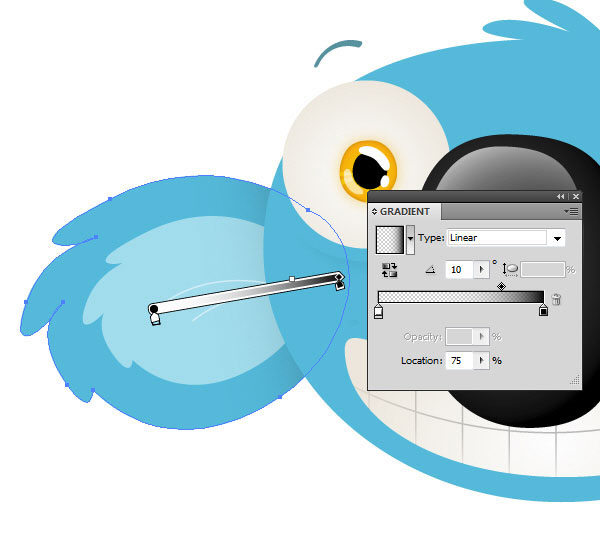
Paste the ear in place (Command +F) and give it a Linear gradient, from white to black. Set the gradient’s angle to 10 degrees, and the diamond slider to 75%. Set the white to 0% opacity. In the Layers Palette, move this new ear layer down until it is below the “head” layer, and above the ears. Set it to Multiply and 60% opacity.

Conclusion

You are done! Try importing your character into Photoshop to give it a final global lighting and color adjustment; and/or to add other elements, like a background. Thanks for sticking through this tutorial!
 
Picasa

Pengikut